
This article describes how to create an Amazon Aurora instance from zero using the AWS console configuring the properties required to obtain a functional database instance.
Create an Amazon Aurora instance from scratch on Amazon Web Services (AWS)
Before starting, consider the following points:
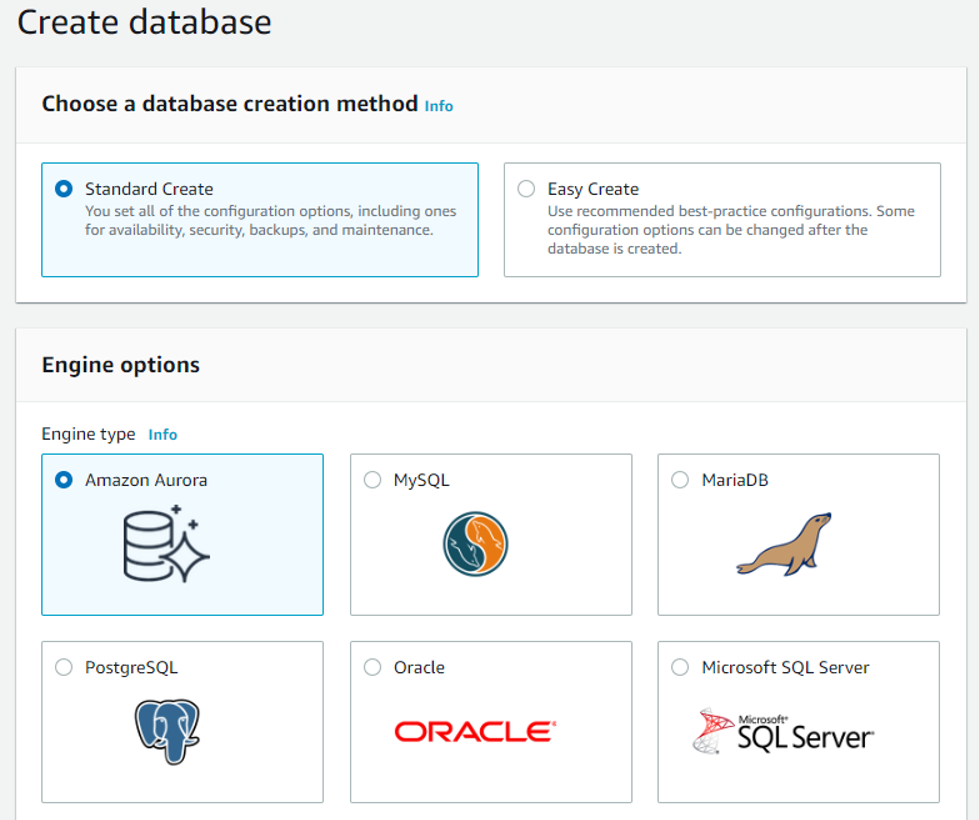
Go to AWS console and navigate to RDS (you can also type in “Aurora”) service, from the left panel select the “Databases” option and tap on the “Create database” button, then the create database page should be displayed. Leave the “Standard Create” option chosen and select Amazon Aurora as the engine.
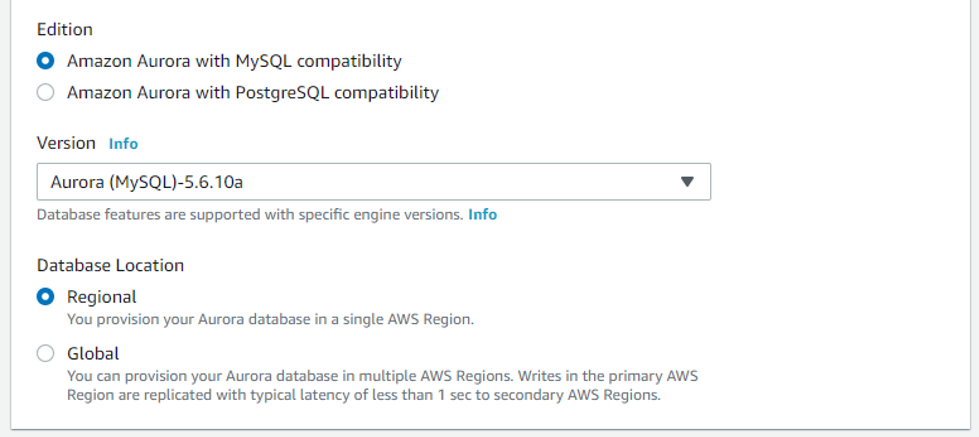
For the edition of Amazon Aurora, you can choose between MySQL or PostgreSQL compatibility (for this example we will be using MySQL). For the engine version, we will work with Aurora (MySQL)-5.6.10a but if you need a specific version for compatibility reasons feel free to change it. For database location you can choose between Regional (you provision your Aurora database in a single AWS Region) and Global (You can provision your Aurora database in multiple AWS Regions), we recommend being specific to reduce costs for this article.
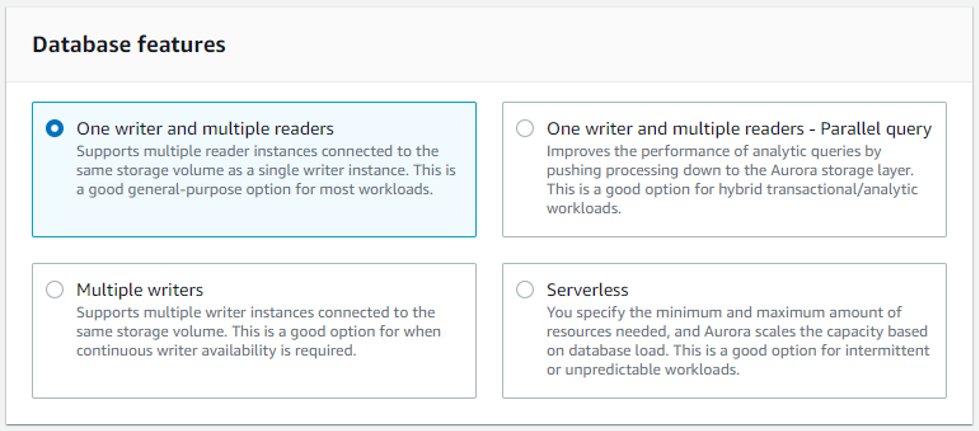
Here you have four options to choose from:
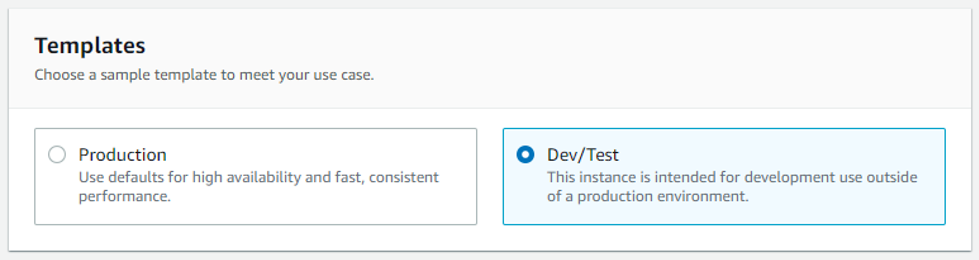
Here you choose if your instance is for the Production environment or for Dev/Test. Note: This will only appear if you previously selected “One writer and multiple readers”, otherwise jump to point 4. Settings.
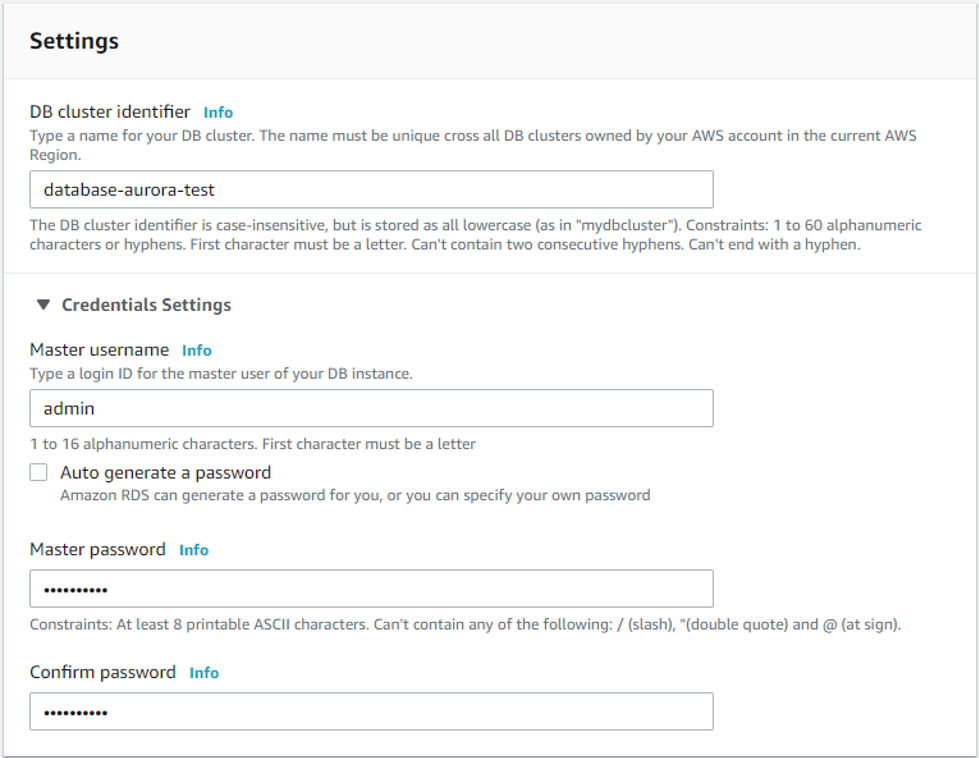
Specify the following properties:
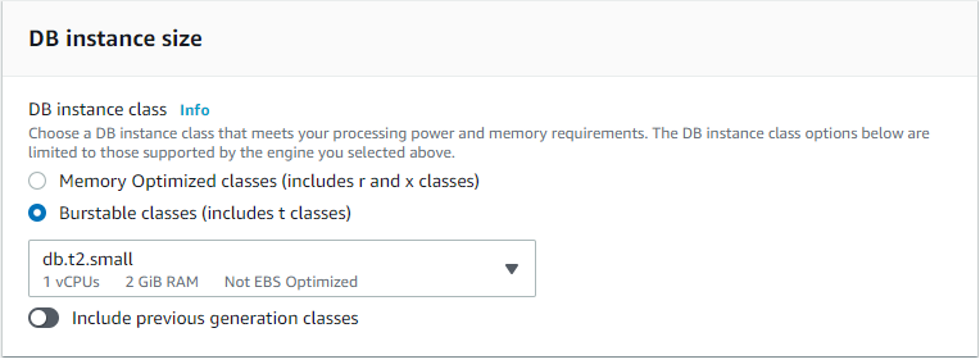
Here you choose the instance class that meets your processing power and memory requirements. In this example, we will use db.t2.small.
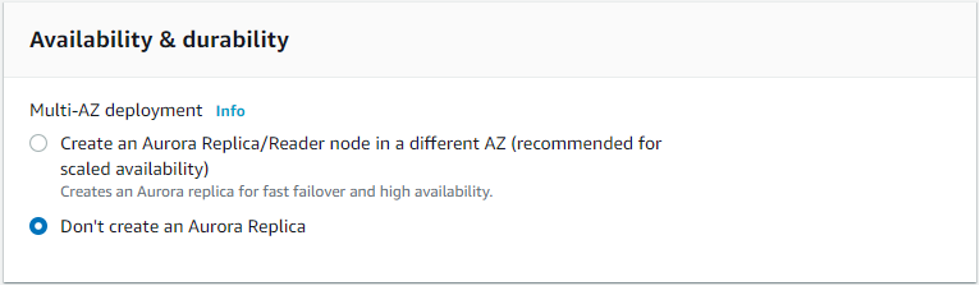
The “Multi-AZ deployment” options helps to maintain a synchronous standby replica in a different Availability Zone, nevertheless, for the purpose of this article we will select "Don’t create an Aurora Replica".
In the “Virtual Private Cloud (VPC)” choose the Default VPC and drop down “Additional connectivity configuration” options:
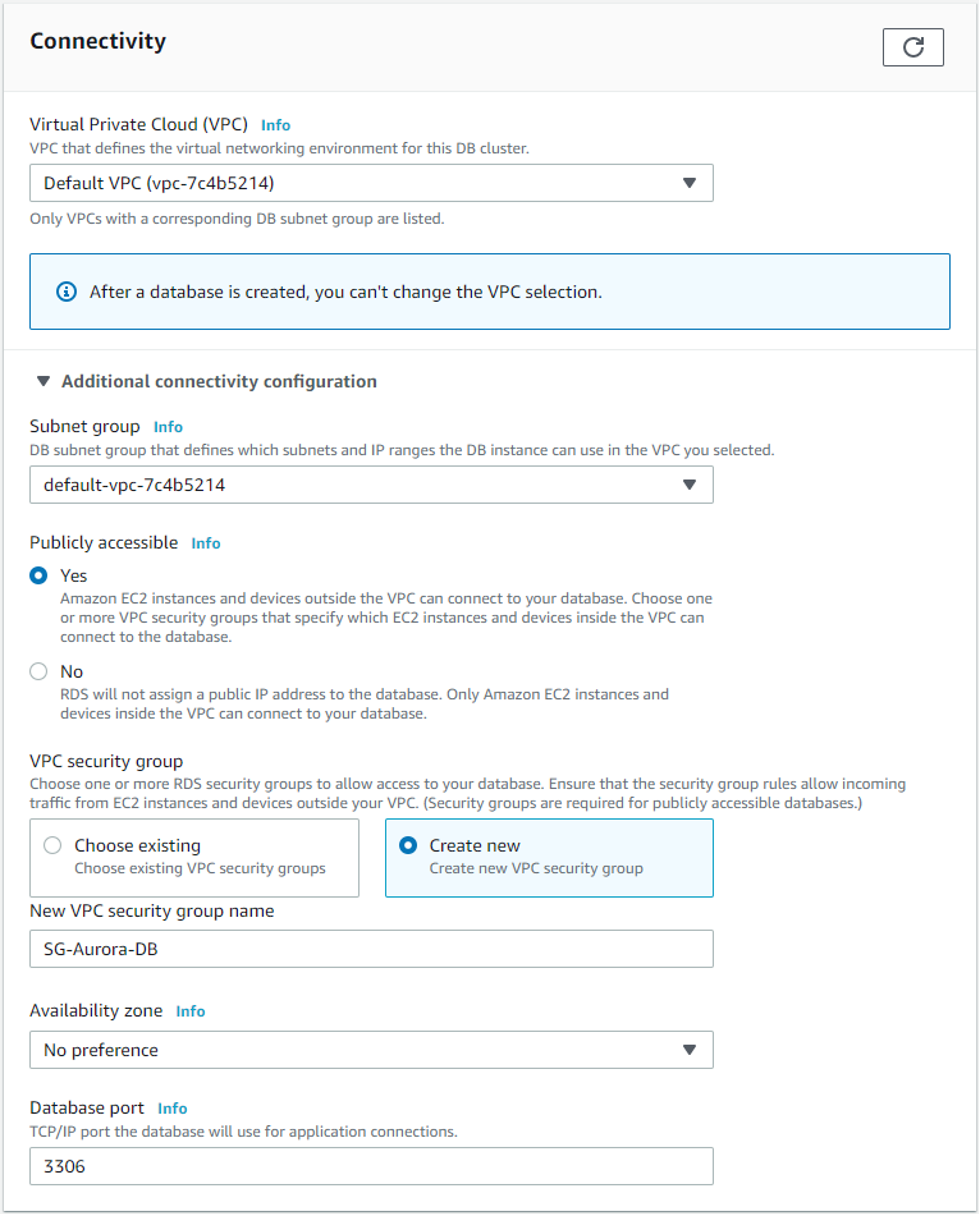
Here you can change some additional configurations such as:
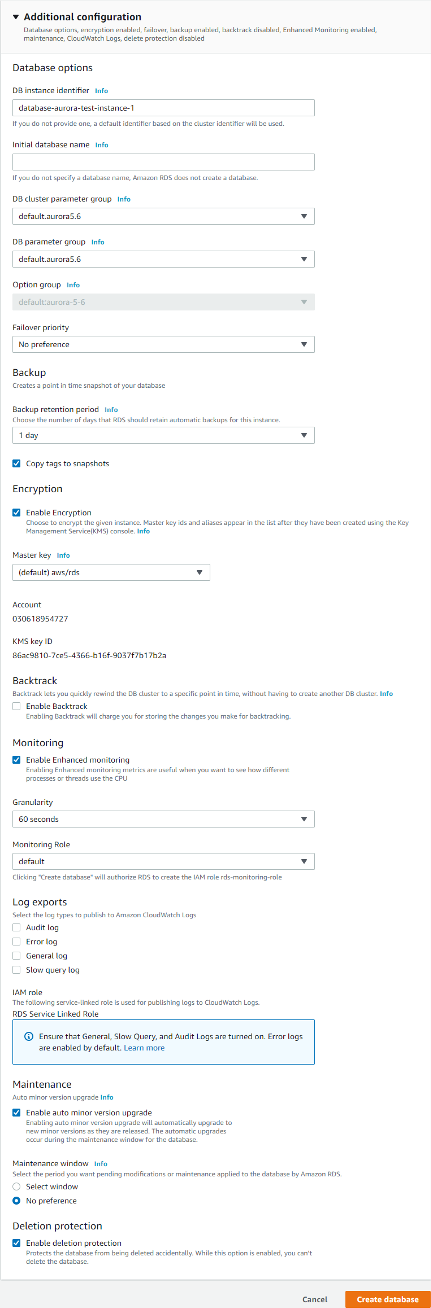
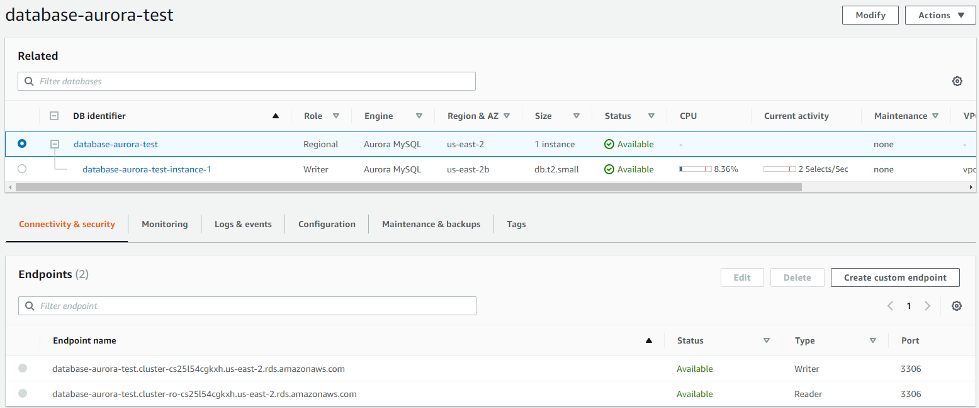
Once you are satisfied with the instance configuration click on “Create Database”. You will be redirected to the database page and you will see that your database is being created. After a few minutes, you will have your Amazon Aurora instance up and ready.
Now is possible to connect to the Aurora cluster using the generated endpoint.
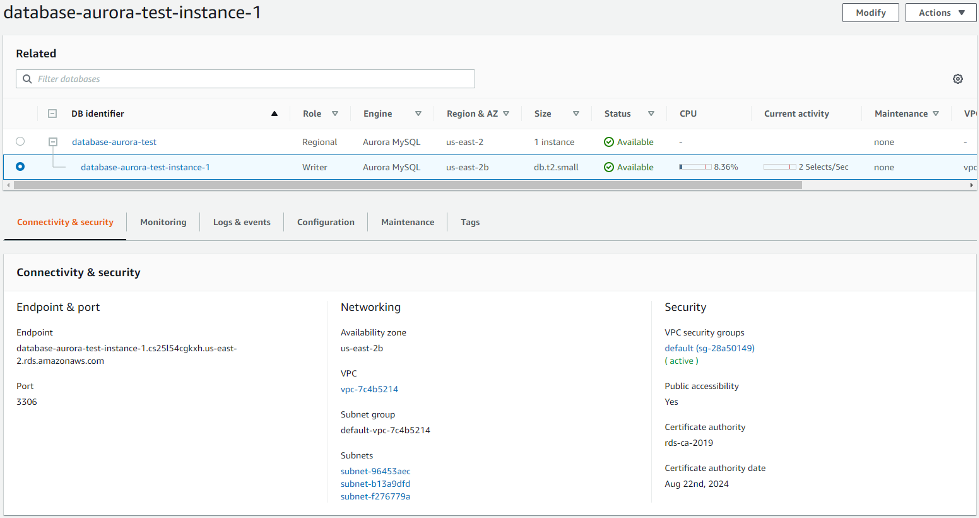
If you wish to connect directly to an instance, choose it and the endoint will be displayed.
In this article, we show how to create an Amazon Aurora instance from scratch in AWS, where we have great advantages of a fully managed service such as automatic backups, security, performance, high availability, vertical and/or horizontal scaling. In addition, Amazon Aurora is up to five times faster than standard MySQL databases and three times faster than standard PostgreSQL databases making it the best choice for many use cases. In a future post, we will talk about how to secure your Aurora database instance following the Well-Architected Framework and security best practices.