
Suppose you have an existing RAML specification to import into Amazon API Gateway for API definition. In that case, you won’t be able to use it as is since API Gateway does not support RAML specifications. This article will guide you step by step on creating a specification file with OpenAPI from scratch from an existing RAML specification.
If you prefer not to manually convert your RAML specification into an Open API Specification (OAS). In that case, we have compiled a helpful list of tools to assist you in this conversion process. It's important to note that the complexity of your RAML may impact the accuracy of the translation performed by these tools. Therefore, it is crucial to review the resulting conversion for any inconsistencies and address them accordingly.
If you already have your OpenAPI definition and want to import it into Amazon API Gateway, the article How to leverage OAS / RAML in AWS API Gateway may help you.
OAS stands for OpenAPI Specification, a specification language for HTTP APIs that provides a standardized means to define your API to others.
Key features and components of an OAS document typically include:
The following tools may help you to translate your API Specifications. Remember, most of the tools may translate your specifications with a few inconsistencies, so it’s crucial to review the final conversion,
If you want to explore more converters, look at a full converters tool list on the website of OpenAPI Converters.
This section will assist you if you prefer or want to learn how to translate your RAML specification into an OpenAPI Specification from scratch.
1.- Reviewing a non-OpenAPI specification file
Let's begin by reviewing a RAML API Specification.
This is a basic RAML specification that only retrieves flight data. It has two resources, one with a path parameter. Both resources have a get method, require a header, and have a 200 response.

Note that the RAML specification above uses data types and examples to represent data retrieved from a server. The examples are the following.
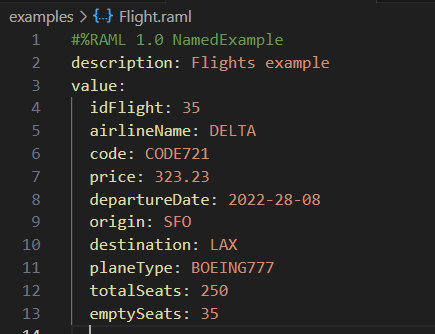
examples/flight.raml
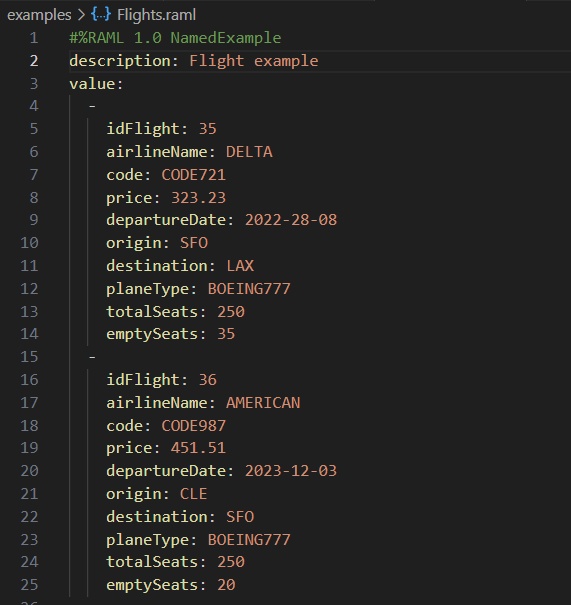
examples/flights.raml
The flight data type is the following.
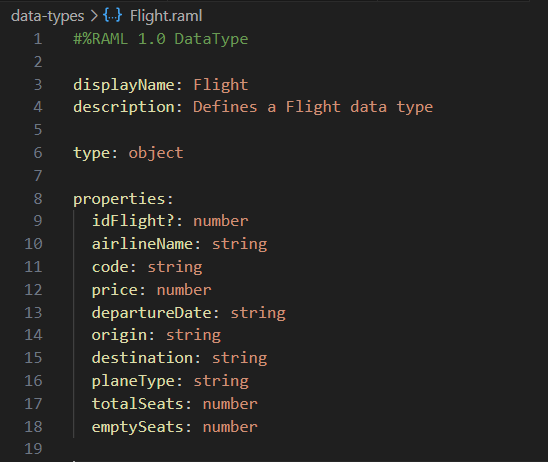
data-types/Flight.raml
The structure of the project will be the following.

API Specification structure
2.- Creating the project
It’s important to mention that currently, Amazon API Gateway supports OpenAPI v2.0 and OpenAPI v3.0 definition files. The article will focus on creating the file in OpenAPI 3.0.0 in JSON format.
Let’s start translating the RAML files you previously reviewed into an OAS JSON file.
First, in a text editor, save a file named flights-api.json (the article uses VSCode, but you can use any text editor you want).

VSCode project name
3.- Adding metadata to the OpenAPI Specification
In this section, we are starting to add some code to the JSON file, setting the following properties inside curly brackets:
The file should be like the following.
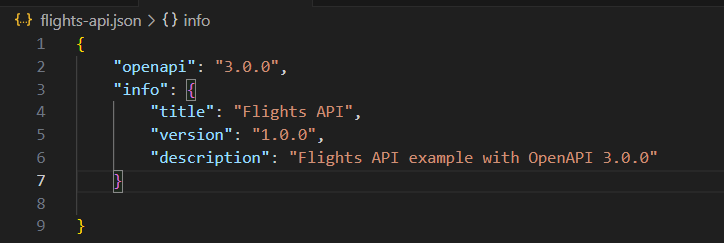
Metadata added to the OpenAPI Specification.
To complete the setup, include the "servers" property to specify the API's access points. We won't add servers in this instance, so that the property will be an empty array. However, it's crucial to import it accurately into AWS Amazon API Gateway.
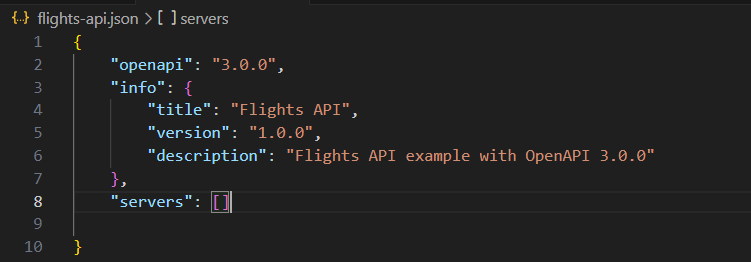
servers property
4.- Creating models
We must translate the data types utilized in the RAML API specification to proceed. If you look at the third line of code in flights-api.raml, you'll see that a Flight data type is defined in data-types/Flight.raml.
Models are employed by Amazon API Gateway to construct an object and represent some flight data.
In your text editor, return to flights-api.json and add the "components" property. Then, within the “components“ property, add another property named "schemas," where we will define the Flight model.
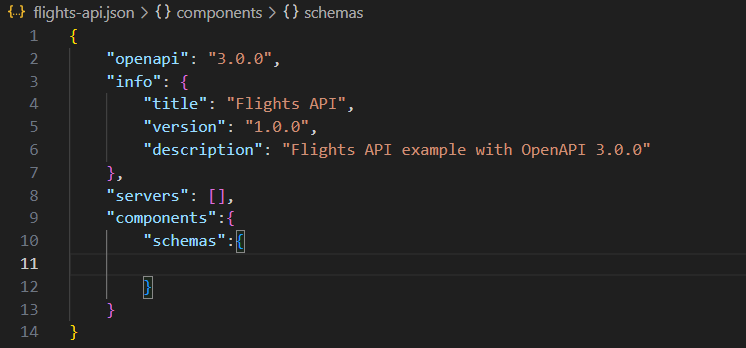
components in OpenAPI specifications
Within the “schemas“ property, add the “Flight“ property. This is how your model will be called in Amazon API Gateway. Within the “Flight“ property, add the following properties:
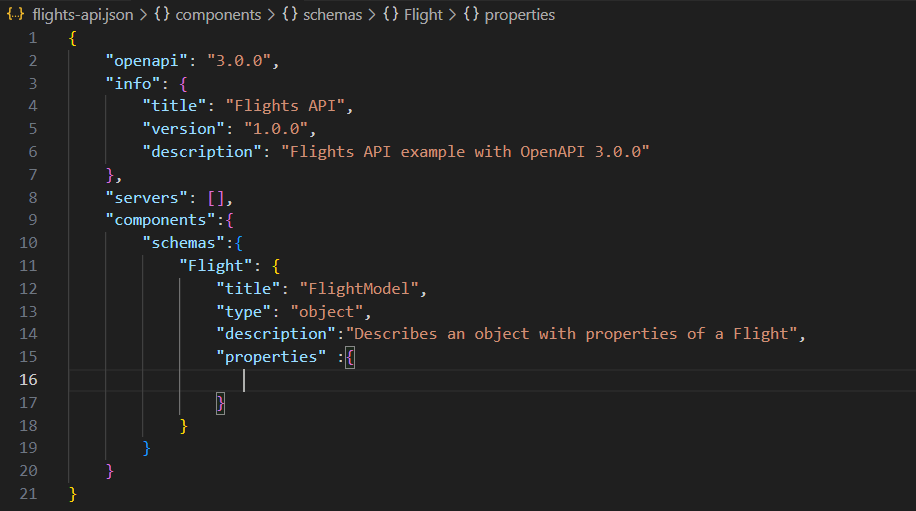
basic structure of the Flights model
OpenAPI defines the properties of a model using the syntax “propertyName“: { “type“: “propertyType“}.
Let's add the first property, "idFlight," which will be assigned a numerical value
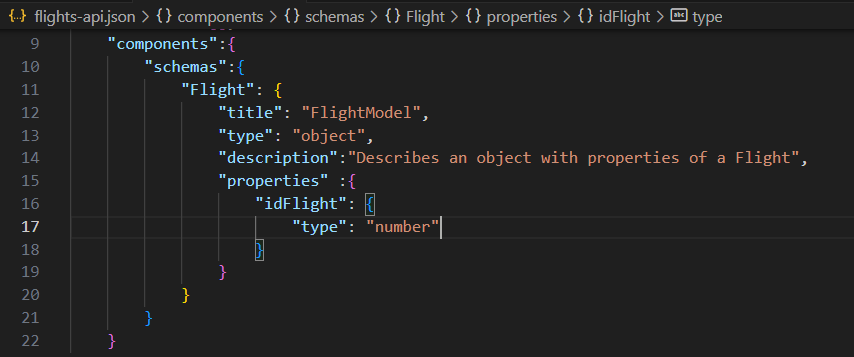
adding properties to the Flights model
Now, add the rest of the properties of the flight.
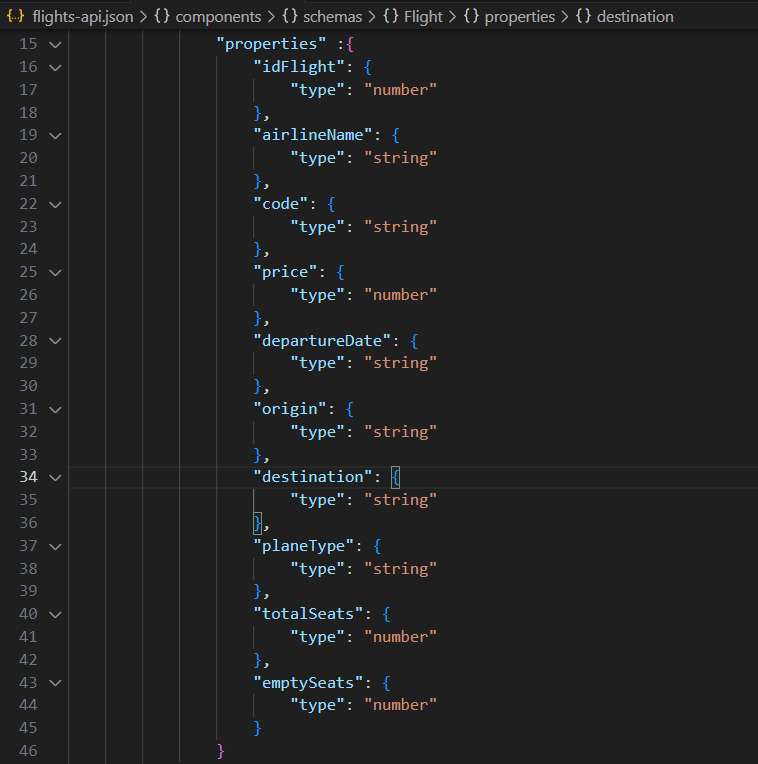
all Flights model properties
Finally, add the "required" property to prevent missing fields when sending a request with a Flight Model body.
This property will be an array with all the fields you want to be required. For this model, all fields except the idFlight field will be required. Note that the property is placed after the “description” property.
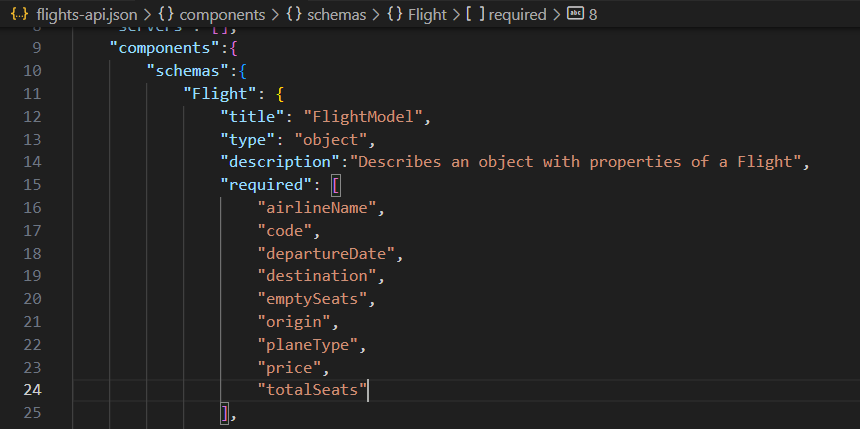
required fields in the Flights model
To proceed, we need to add another model called Flights, an array of previously created Flight models. Note that we will add this model to the beginning of the "schemas" section, although it can be added anywhere. Also, instead of "properties," we will use the "items" property and reference the Flight model.
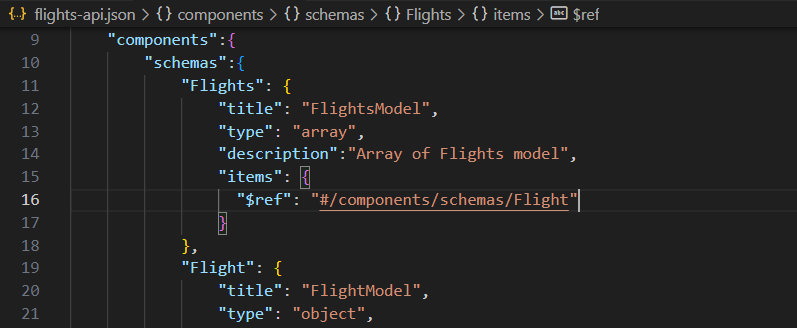
Flight model referencing Flights model
5.- Setting a resource
In this part, we are setting up the resources to define to accept requests in our API Gateway.
Next to "servers," add another property called "paths." There, we will define the resources needed. The first resource to add is "/flights". Note that all resources must have and slash (“/“) followed by the resource name.
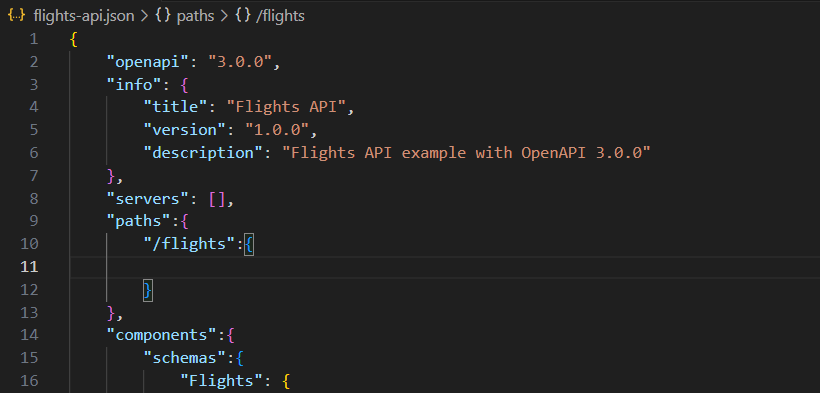
/flights resource
We can select the desired methods (GET, POST, PUT, PATCH, DELETE, OPTIONS) within the newly created resource. For this scenario, we will simulate a GET method to retrieve a list of Flight data. To achieve this, we have established an array model of Flights.
Add the "get" property and within another called "summary" to specify a short method description for documentation.
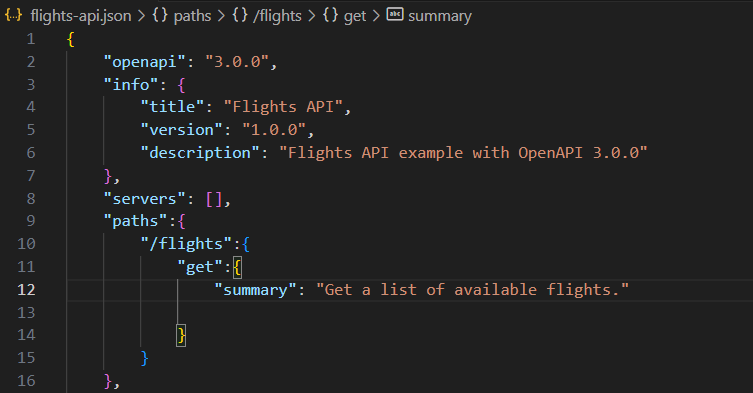
adding a get method and its documentation
OpenAPI specifications use "parameters" to define an array of objects containing all the properties of the parameters.
Note: Path parameters will be explained later in this article.
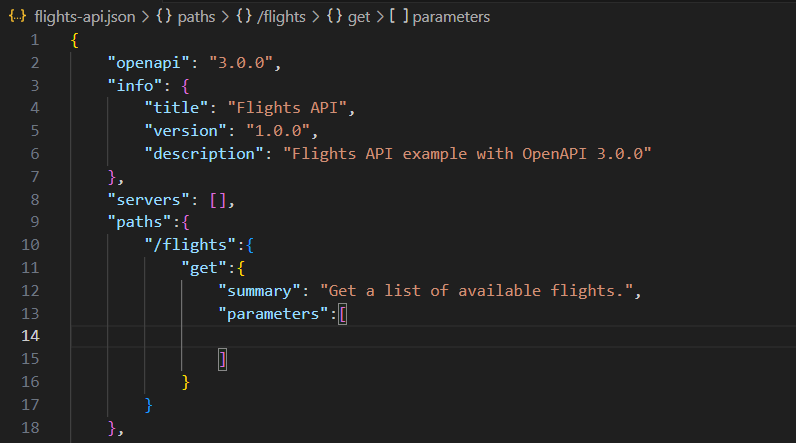
parameters property
Add the following properties as an object within the "parameters" array.
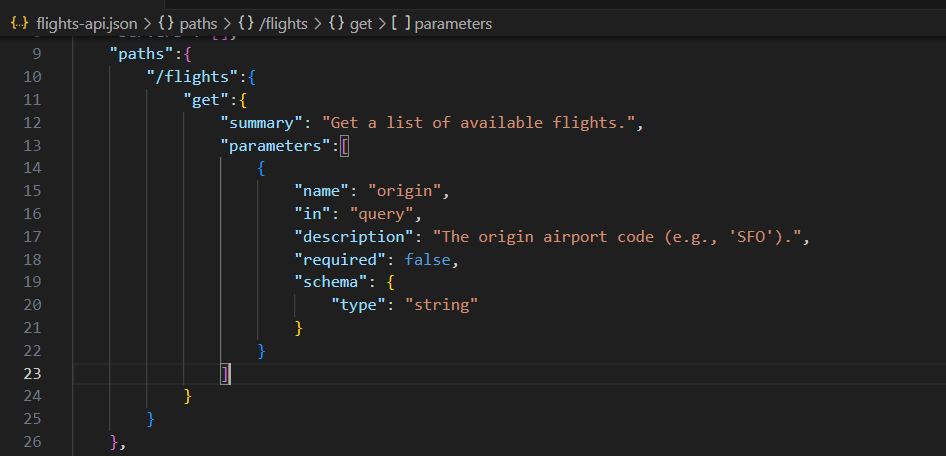
origin query parameter
Add another parameter with the following values;
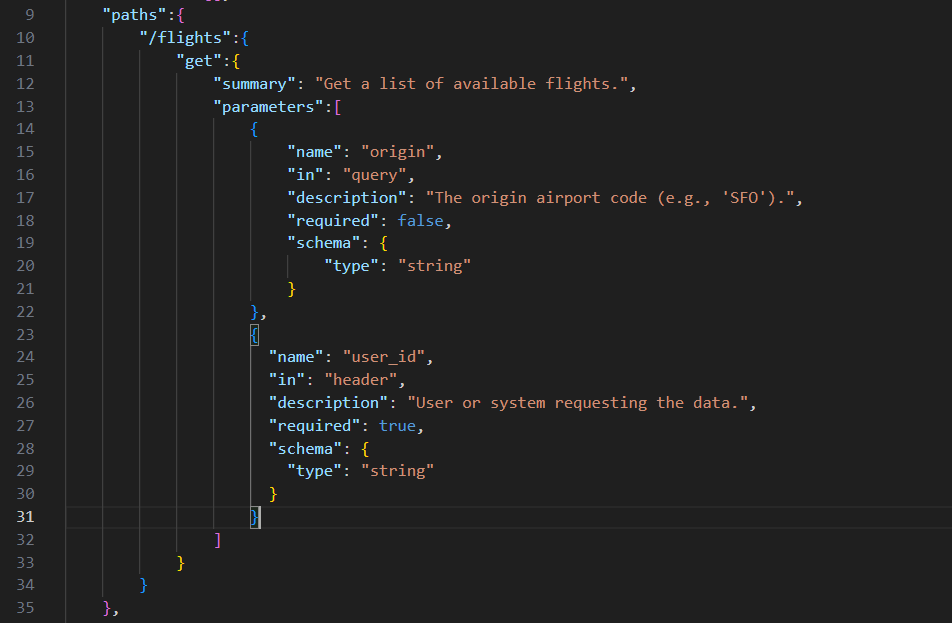
adding user_id header
6.- Creating responses
Adding the property “responses“ is how we create responses to our method within the get property. This property for this method indicates the status code and the answer.
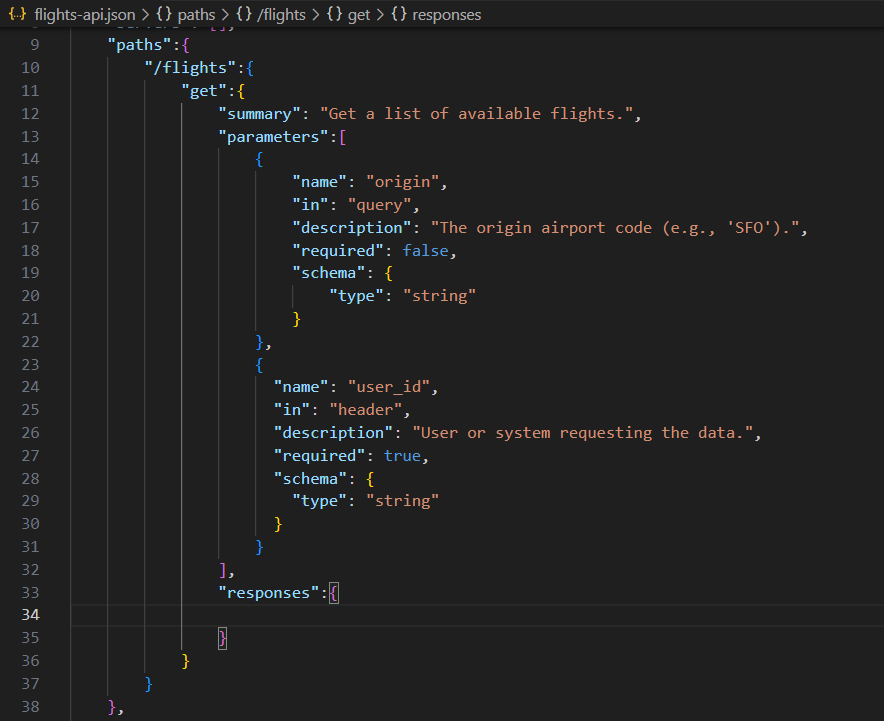
adding responses property
For this example, we are adding a 200 response as a property; within the “200“ property, add the following values within curly brackets:
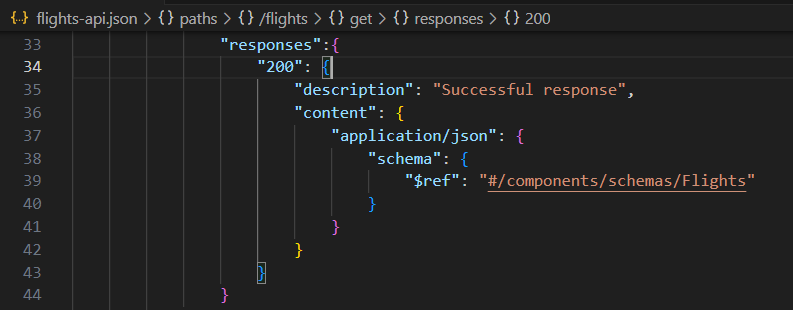
200 response property referencing Flights model
7.- Adding integration responses (examples in RAML)
In RAML specifications, there is a possibility to simulate data retrieved from a server. We can do this by using examples. In this section, we can achieve this by creating integration responses to simulate data retrieved by a server.
Add "x-amazon-apigateway-integration" within the “get“ property. Within, add the following.
"#set($inputRoot = $input.path('$'))
\n
{
\n
\"idFlight\": 35,
\n
\"airlineName\":
\"DELTA\",\n
\"code\":\"CODE721\",
\n    \"price\": 323.23,\n
\"departureDate\":\"2022-28-08\",
\n    \"origin\": \"SFO\",
\n    \"destination\":\"LAX\",
\n    \"planeType\":\"BOEING777\",
\n    \"totalSeats\": 250,
\n    \"emptySeats\": 35
\n
}
"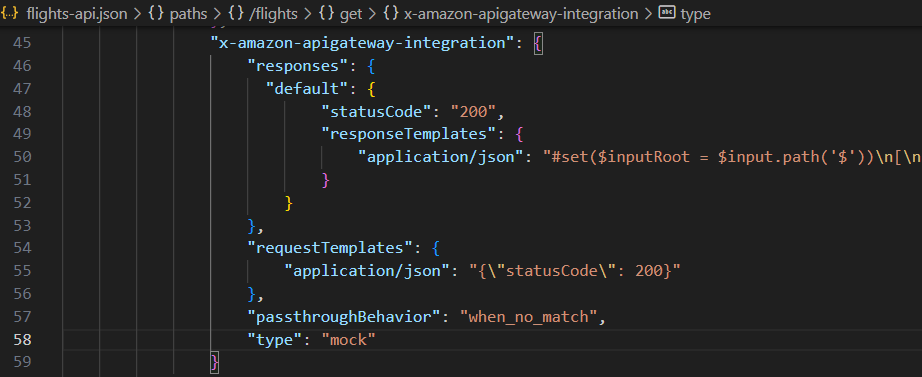
adding integration responses
8.- Adding path parameters
In Amazon API Gateway, we must add a resource as a property with the path parameter within curly brackets. In this case, we want to set the idFlight path parameter for a get method to retrieve a single Flight model data.
Remember to add the resources with the same indentation as the “/flights“ resource in the “paths“ property.

adding a resource with a path parameter
The next step is to add the parameters property array as we did in the “flights“ resource with the following values.
Note that the “in” property indicates the path that will request it. Finally, add the same user_id header we added in the “flights“ resource.

adding query parameters
After the “parameters“ property, add the same success response we add in the “flights“ resource. The only change it will have is in the “$ref” property. This response will reference the single-flight model created early in this article.
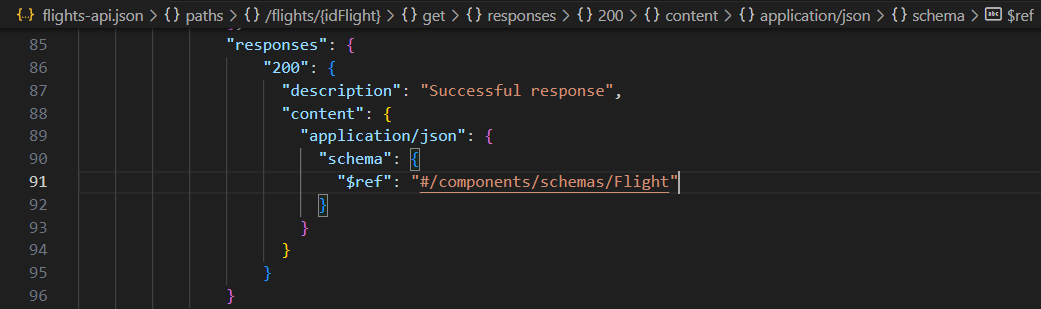
Also, add the same “x-amazon-integreation-gateway” property to send a mock simulating data. The only change we will make is in the responseTemplates property. This response will be shorter than the “/flights“ resource integration response.
Change the value to a single-flight mock response:
"#set($inputRoot = $input.path('$'))
\n
{
\n
\"idFlight\": 35,
\n
\"airlineName\":\"DELTA\",
n    \"code\":\"CODE721\",
\n    \"price\": 323.23,\n
\"departureDate\":\"2022-28-08\",
\n    \"origin\": \"SFO\",
\n    \"destination\":\"LAX\",
\n    \"planeType\":\"BOEING777\",
\n    \"totalSeats\": 250,\n
\"emptySeats\": 35\n
}
"
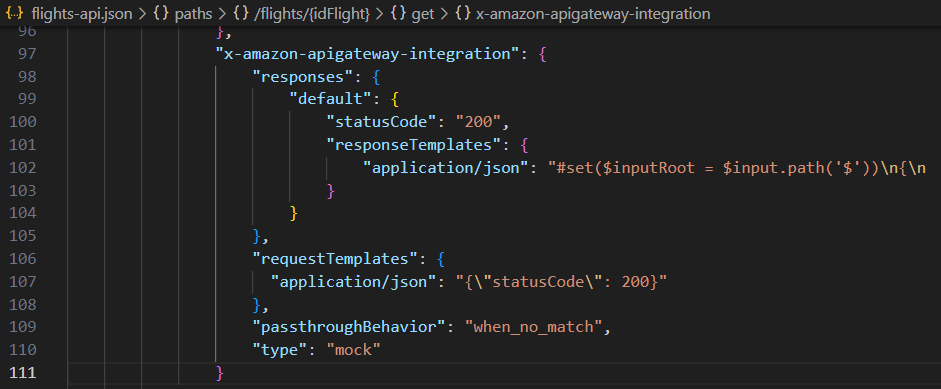
adding integration responses
9.- Adding validators to the OpenAPI Specification
To set up configurations that validate if a header, query parameter, or path parameter is missing in a request sent, you can add the property "x-amazon-apigateway-request-validators".
If you recall, we previously added the "user_id" parameter as a required header. With Amazon API Gateway, the request validators are responsible for verifying if the header is present in the request. If not, an error indicates that the header is missing.
We are using the following types for validation.
At the same indentation as the “paths“ property, add the "x-amazon-apigateway-request-validators" property. We will set up two types of validation to choose from.
As you can see, two possible configurations are defined to validate incoming requests for the API. Remember, you can define as many configurations as you want; in this case, they are “basic” and “params-only.”
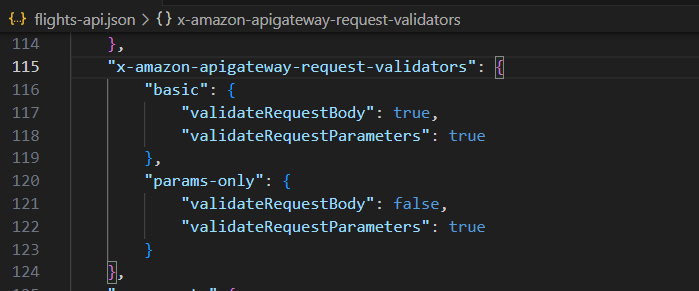
adding validators
The next step is to use those validators in our created methods. In the “/flights“ resource after the "x-amazon-apigateway-integration" property. Add "x-amazon-apigateway-request-validator" as a new property with the " basic " value indicating the basic validator will be applied to that method.
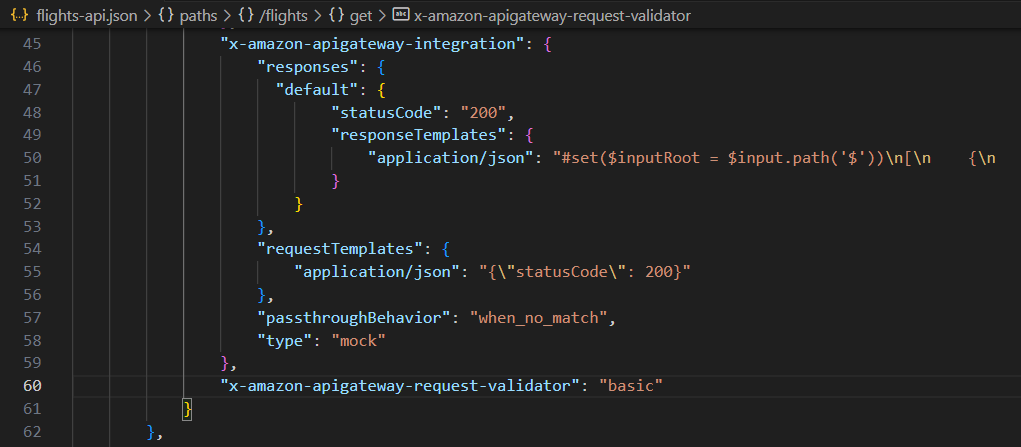
applying validator to /flights resource
Do the same for the “/flights/{idFlight}” resource, changing the value to “params only. “
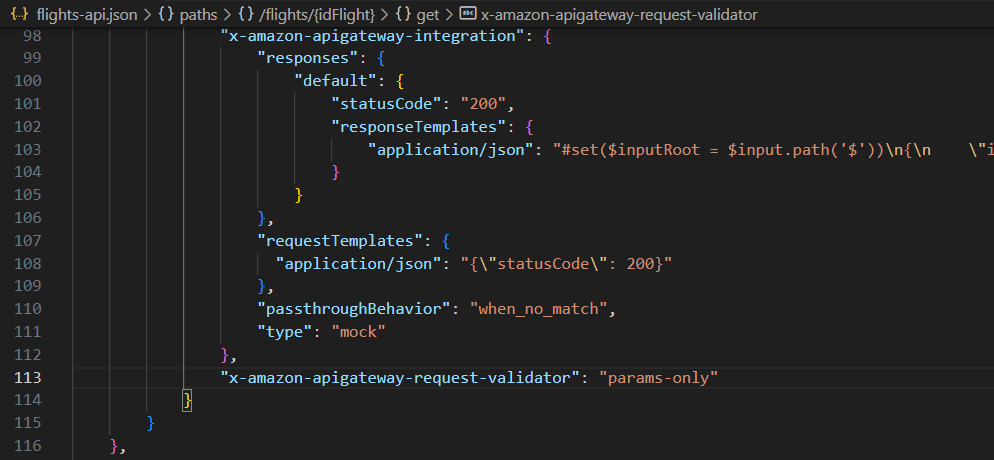
applying validator to /flights/{idFlight} resource
Finally, you must validate if the OpenAPI specification file you created works correctly. The article How to leverage OAS / RAML in AWS API Gateway shows you how to import your Specification and test it.