
Before starting, consider the following points:
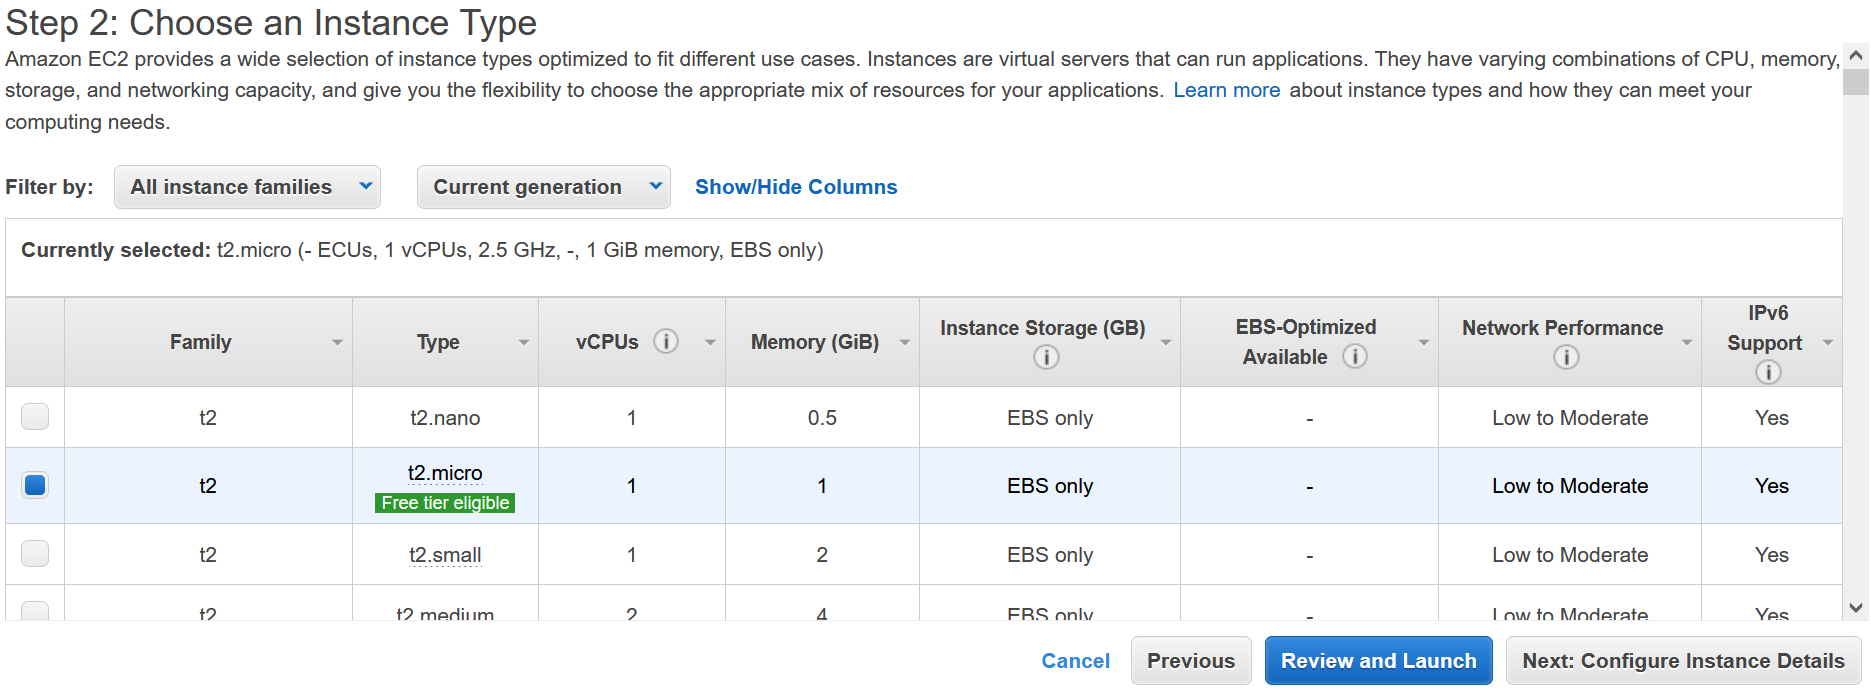
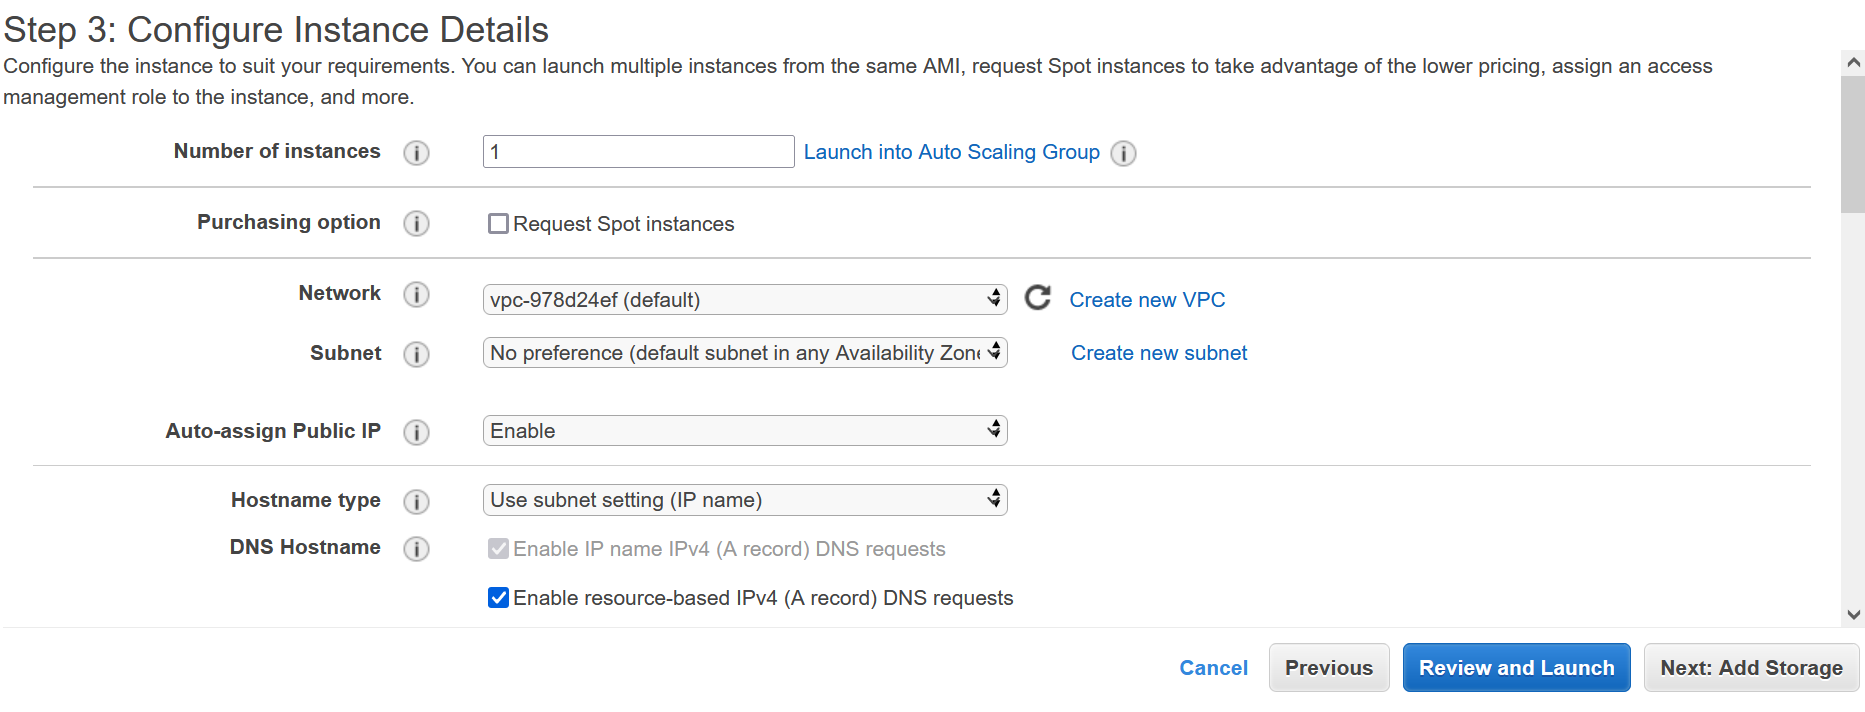
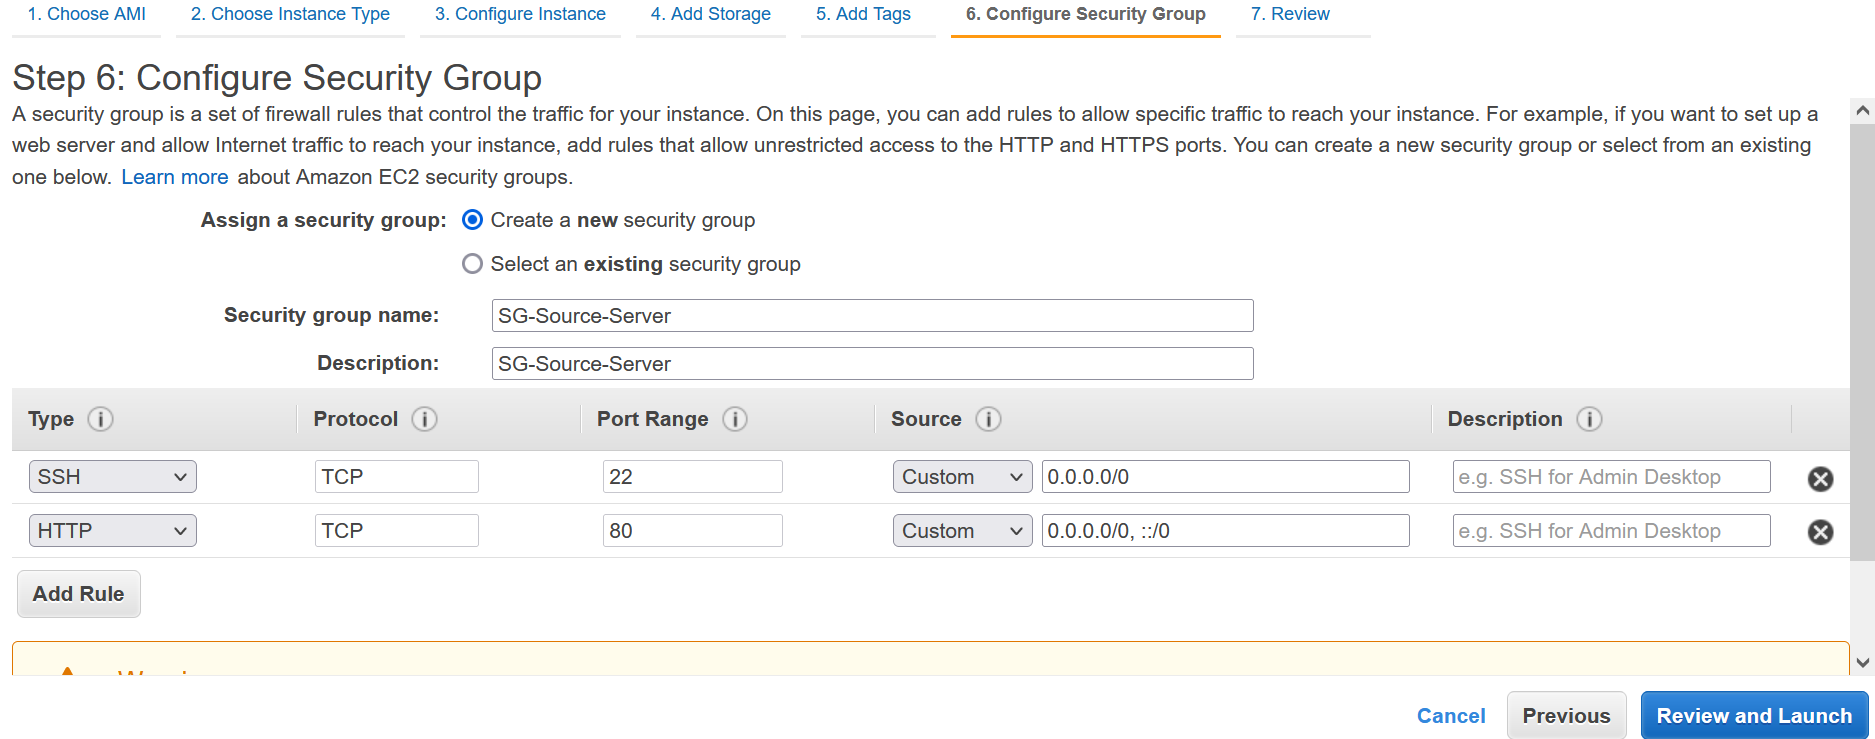
Go to the AWS console in the region you prefer, select the service EC2 (Virtual Servers in the Cloud), and launch the instance. Select the Amazon Machine Image and Instance Type you choose for your project with Public IP and create a security group with port 22 and port 80 enabled on inbound rules. See the images below.
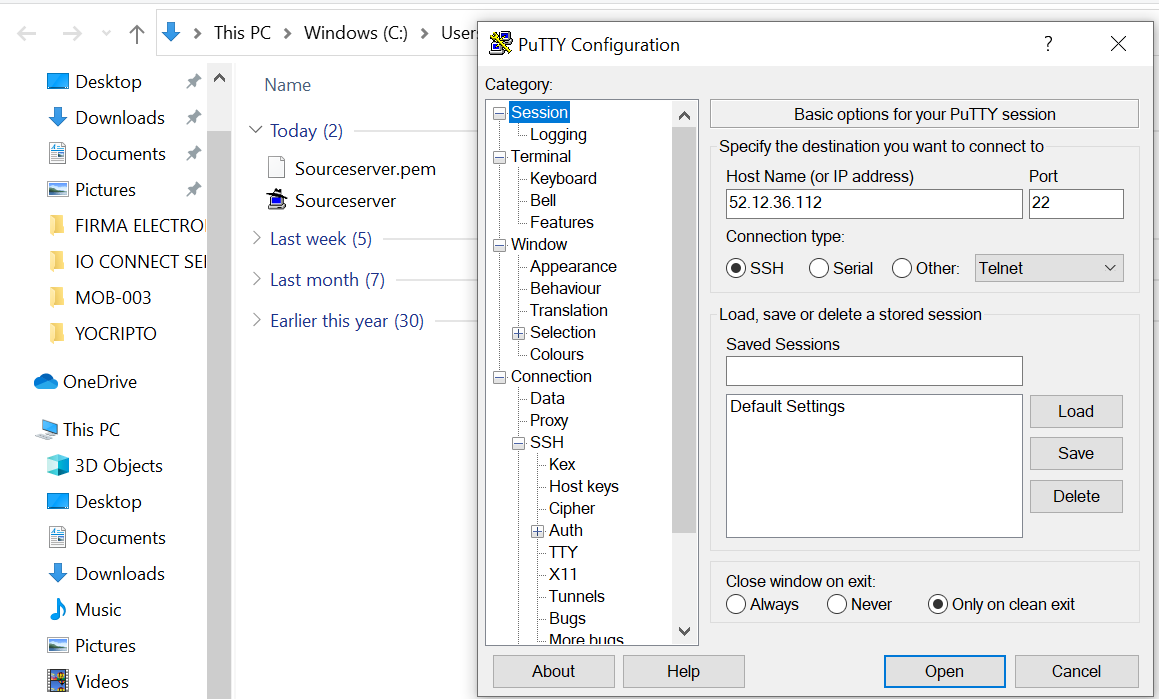
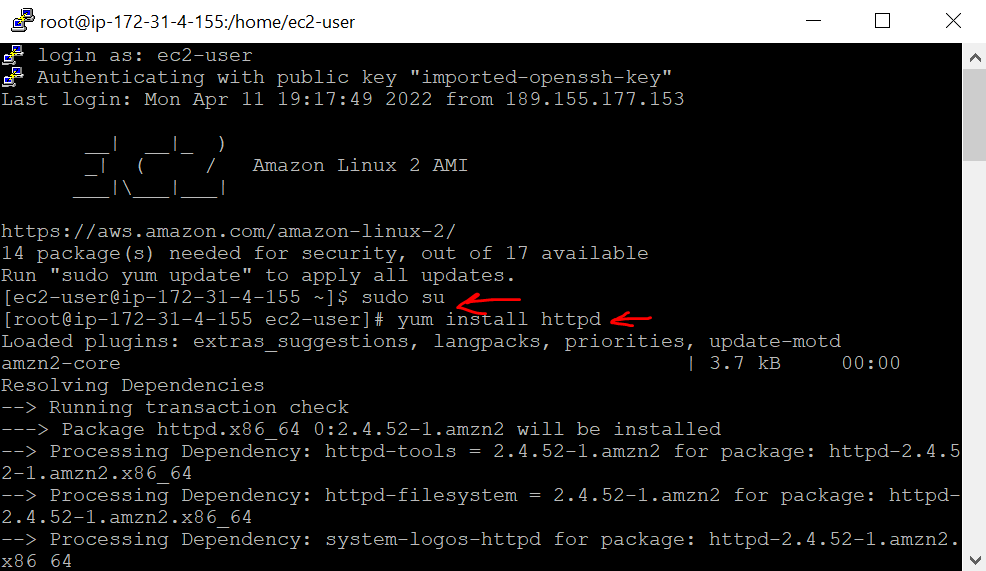
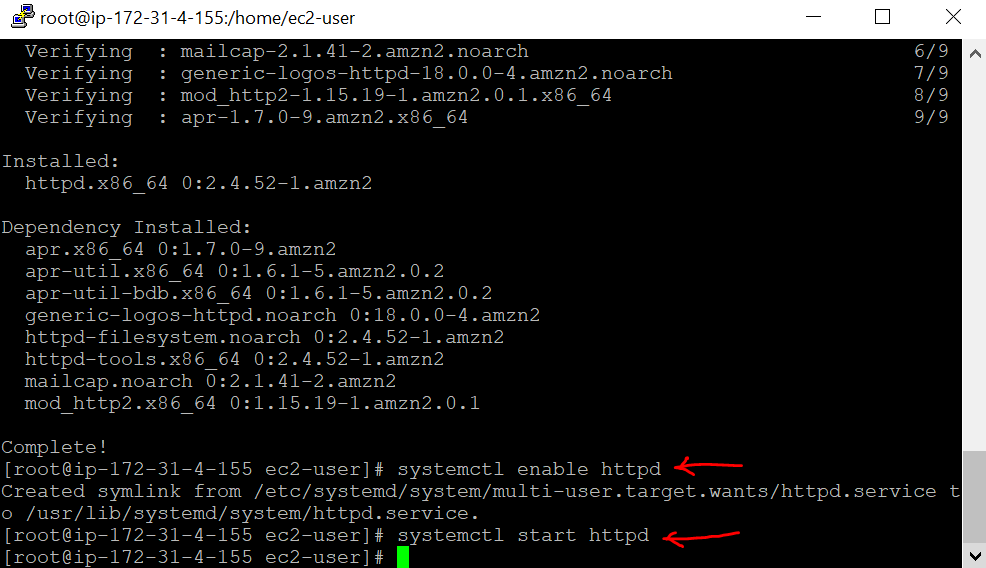
Once the server is deployed, it is time to connect across SSH into your EC2 instance and switch to root and install, enable, and start httpd in PuTTY.
By using the Public IP assigned to your EC2 instance, you can connect to the server and use third-party software like puTTY to open the connection. See the images below.
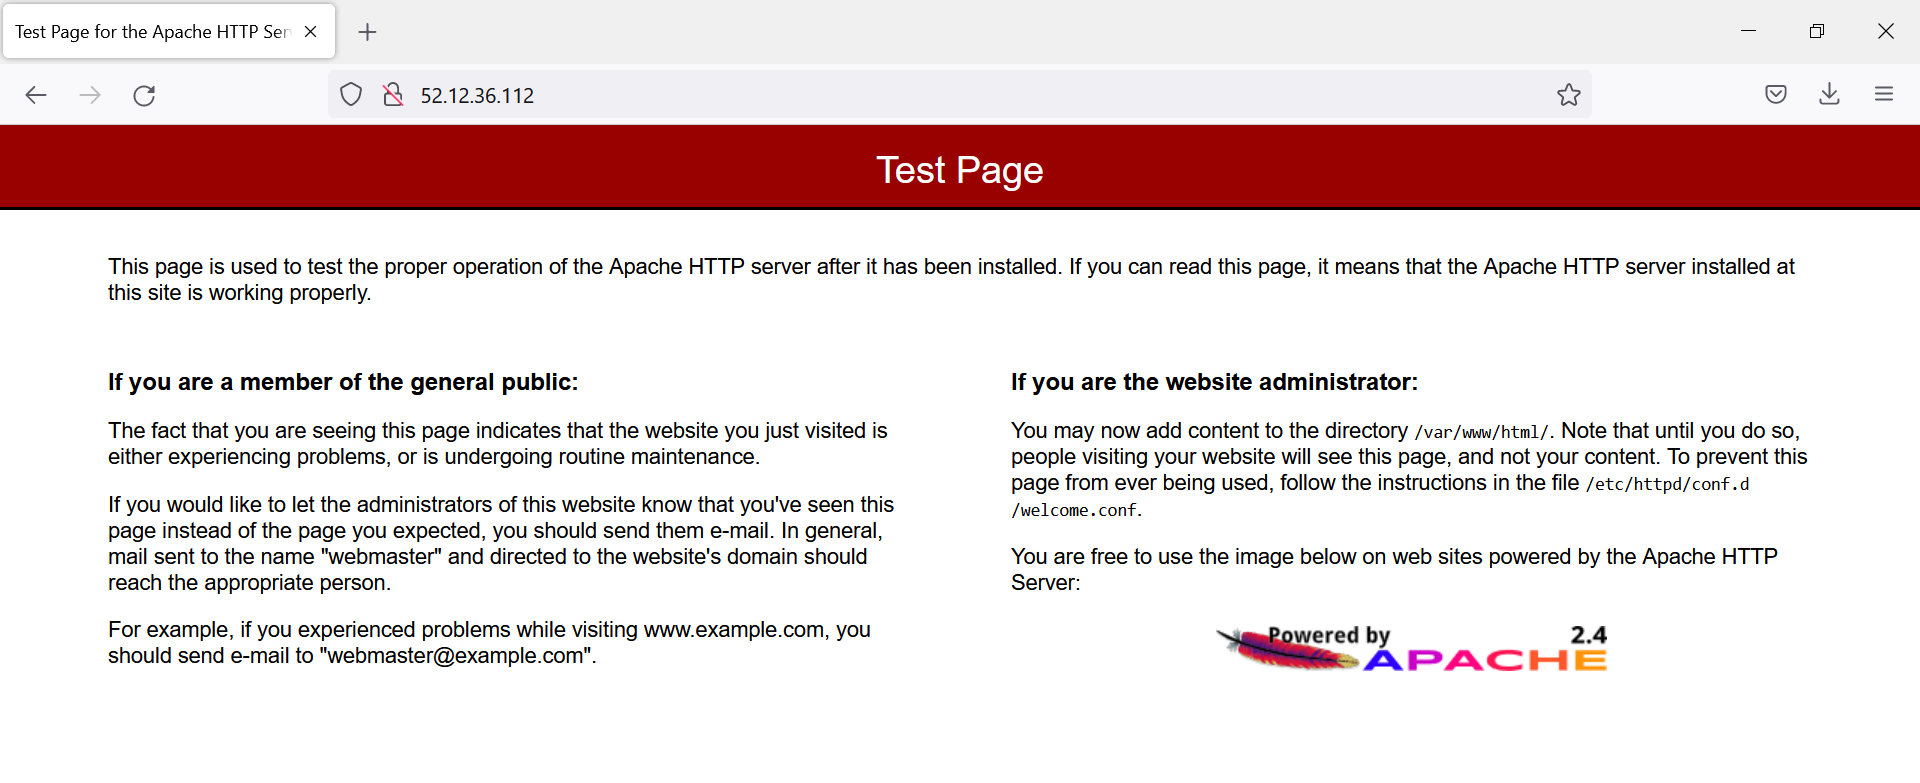
Create a test HTML file on the EC2 instance and save it as index.html.
Place your index.html in /var/www/html/ and add some sample html text. This html file will act as your website.
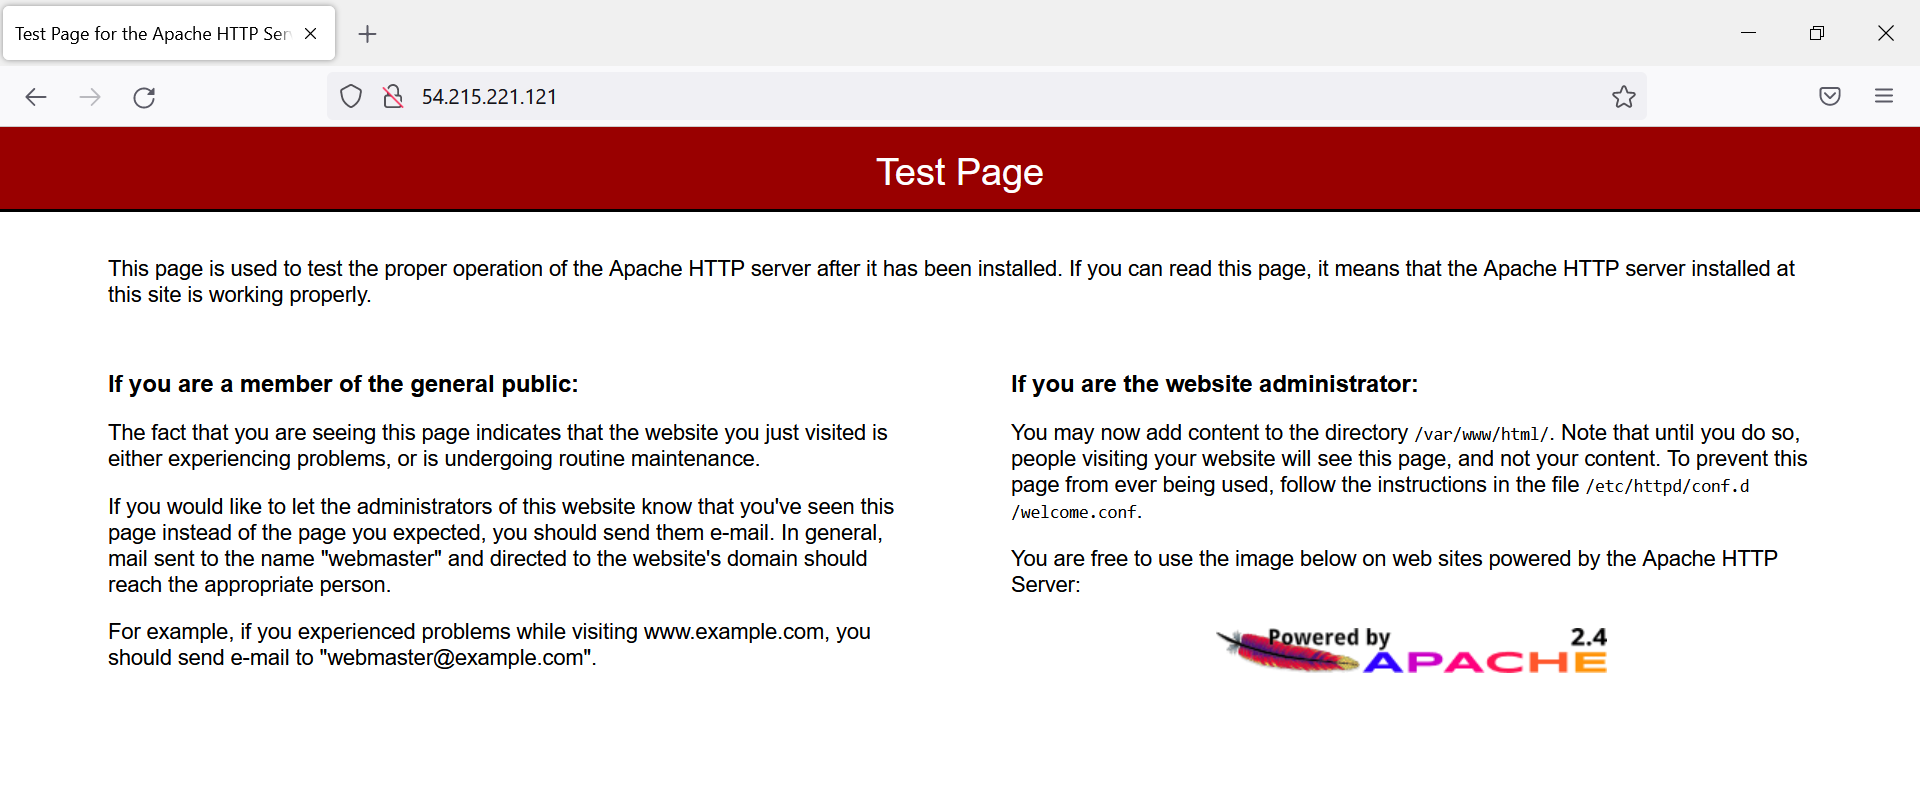
Go to the web browser and test your html file using the EC2 instance public IP.
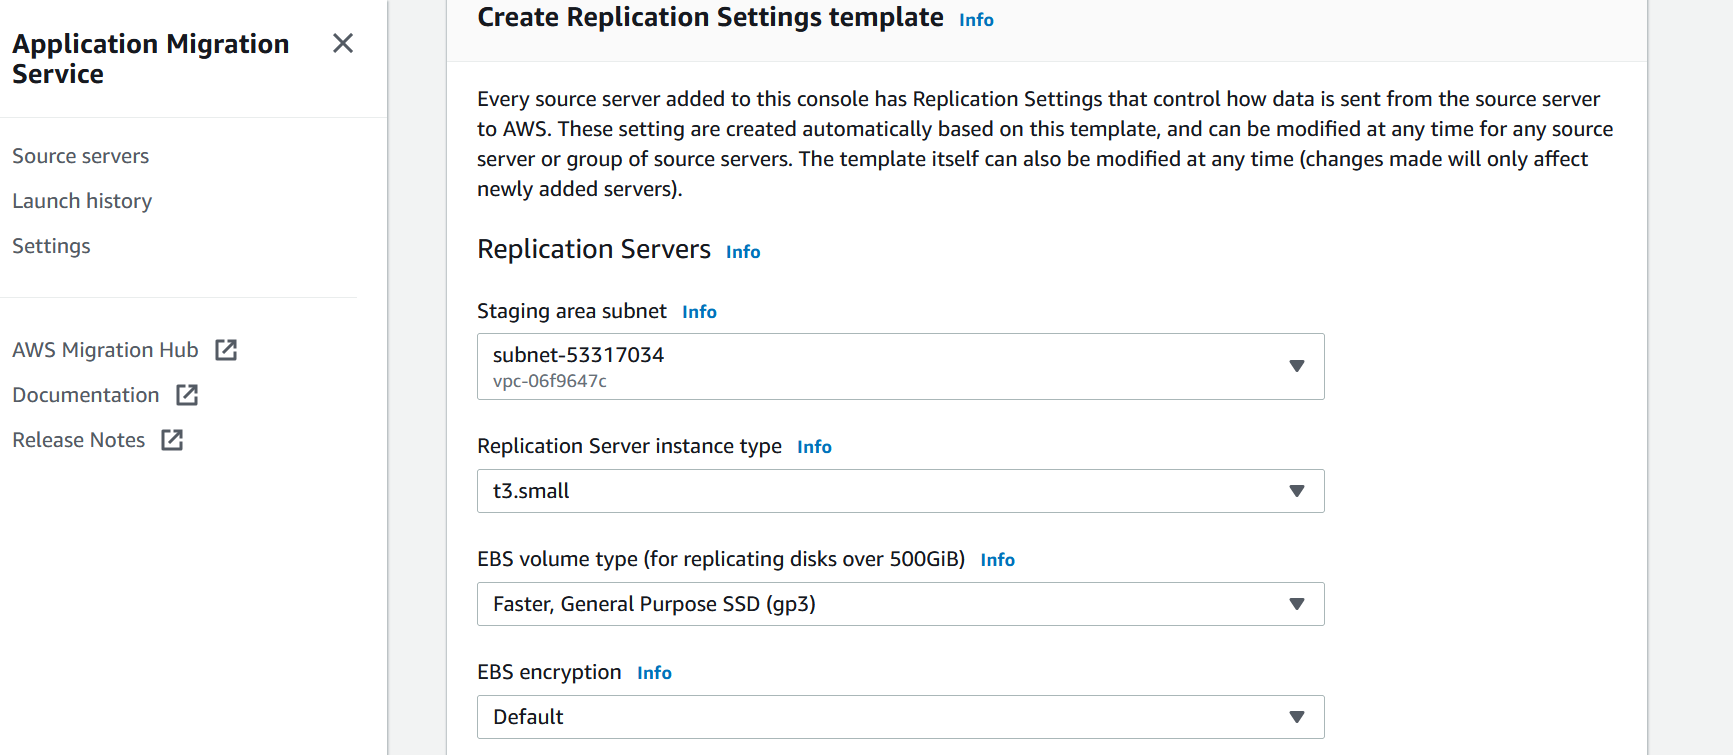
Select on AWS Console the service Application Migration Service (automates lift-and-shift migration). The service must be initialized in any AWS region you plan to use and copy the source server over your target region. Verify the subnet ID and VPC of the EC2 instance source server, select the security group, and create a template.

This is the subnet where AWS Application Migration Service will create Replication Servers.
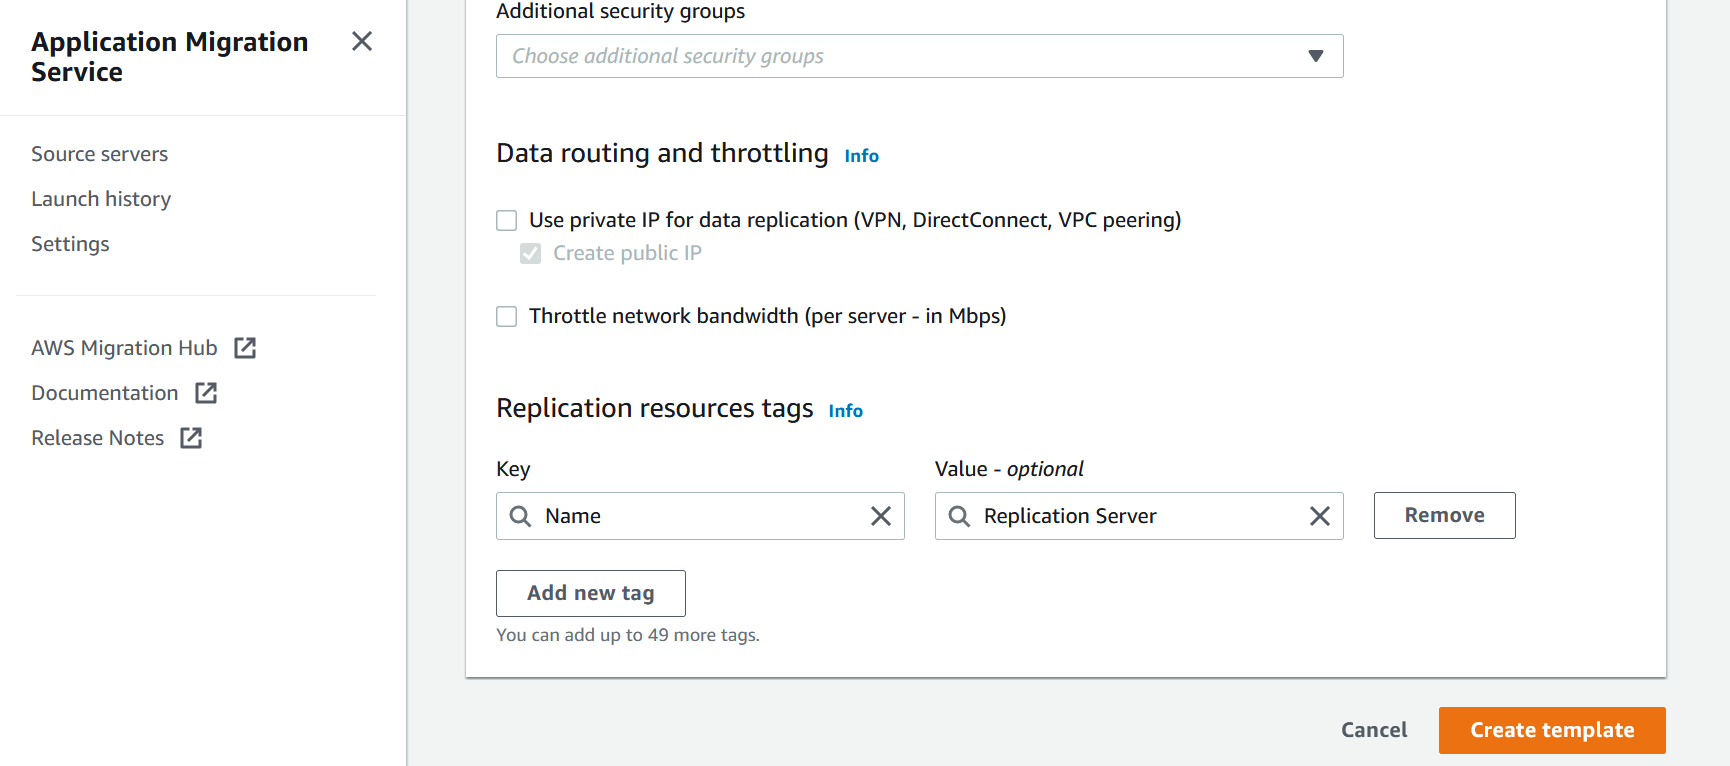
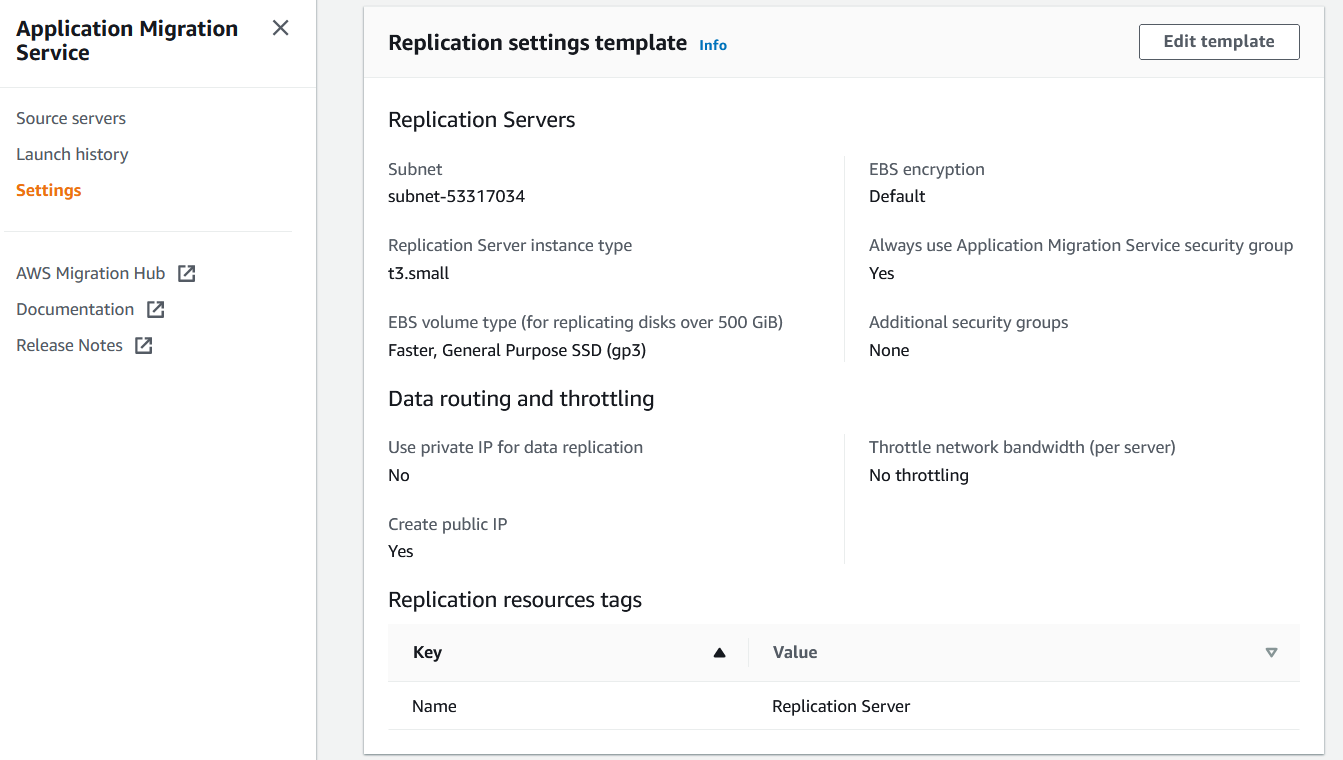
The template has been created successfully.
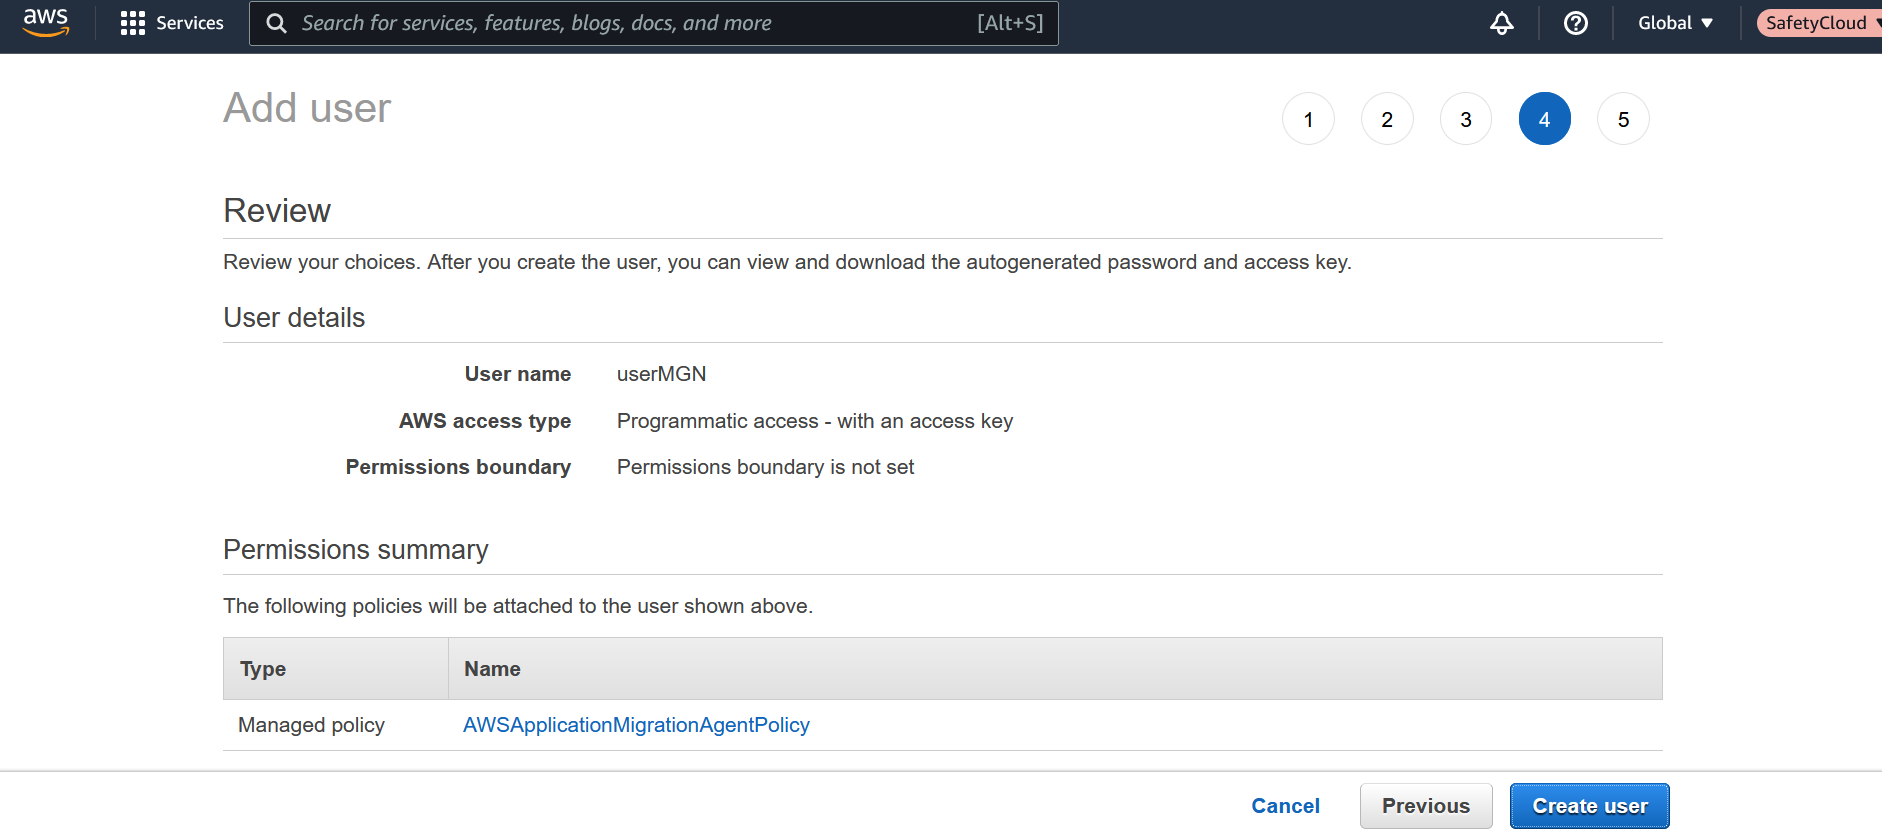
In the AWS Console, go to the global service IAM (Manage access to AWS resources). In Access Management go to Users and adds a user.
Provide and Username and select Access type as Programmatic.
Choose the Attach existing policies directly and attach AWSApplicationMigrationAgentPolicy.
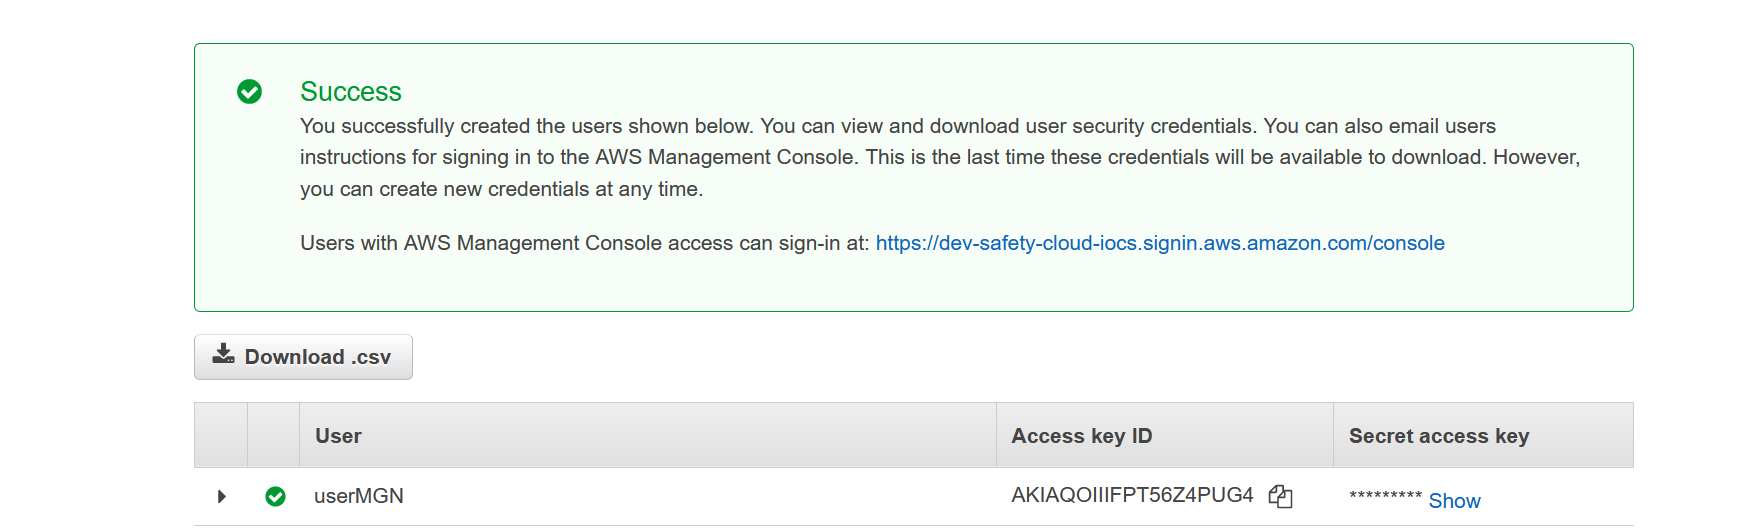
When the user has been created, copy the Username, Access Key ID, and Secret Access Key in a notepad.
In puTTY, in the same SSH connection from the EC2 instance source server, download the agent installer using the below command.
wget -O ./aws-replication-installer-init.py https://aws-application-migration-service-replicationregion.s3.amazonaws.com/latest/linux/aws-replication-installer-init.py
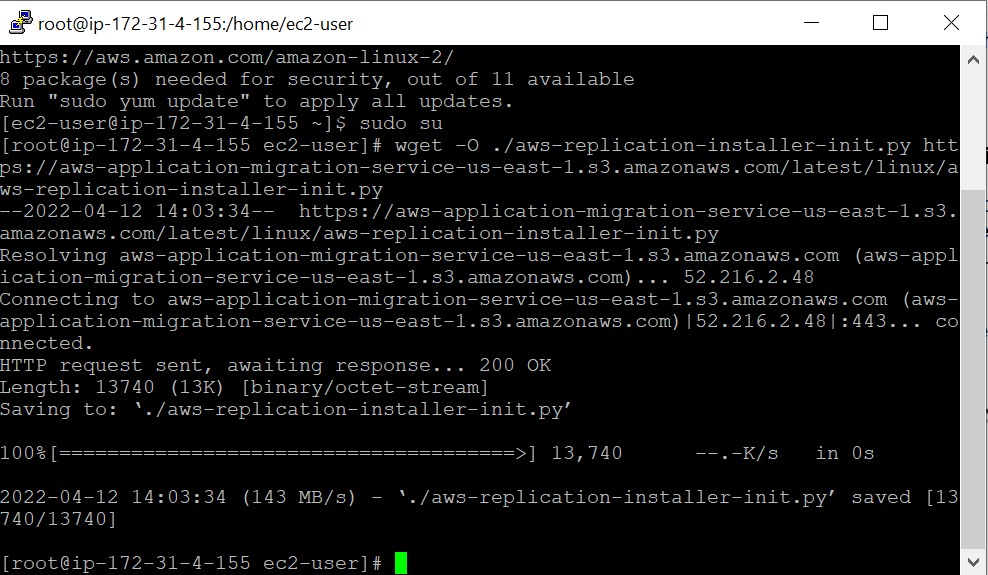
Install the agent after the agent installer has successfully downloaded.
sudo python3 aws-replication-installer-init.py
For this process, you need to set the replication region where the EC2 instance is replicated and use the Access Key ID and Secret Access Key generated by the IAM user.

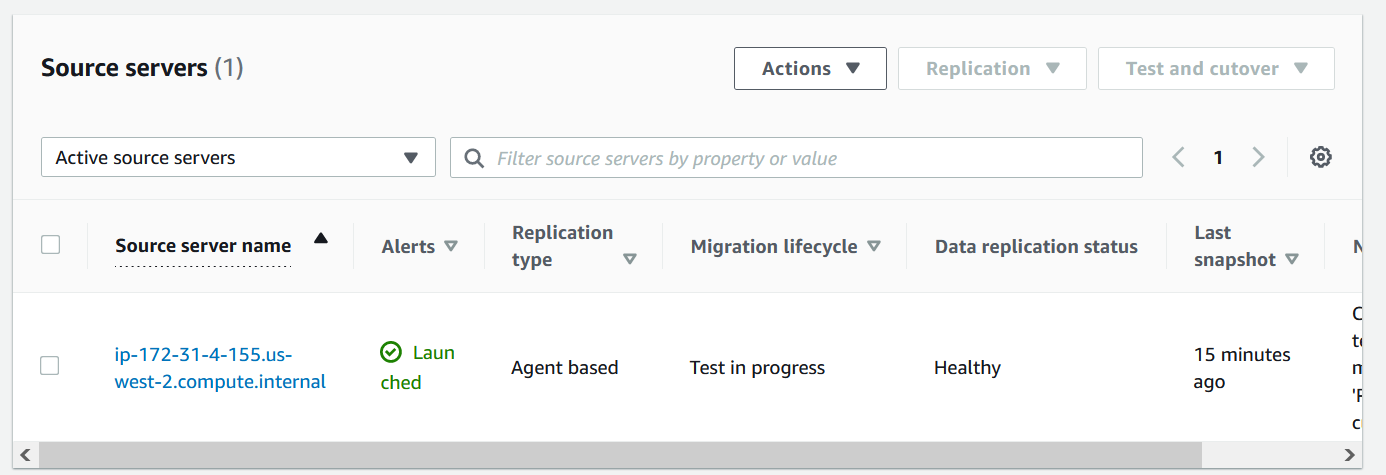
The Replication has started. Once the agent is installed, you will see information about it in the Application Migration Service Source Servers list. See the image below.
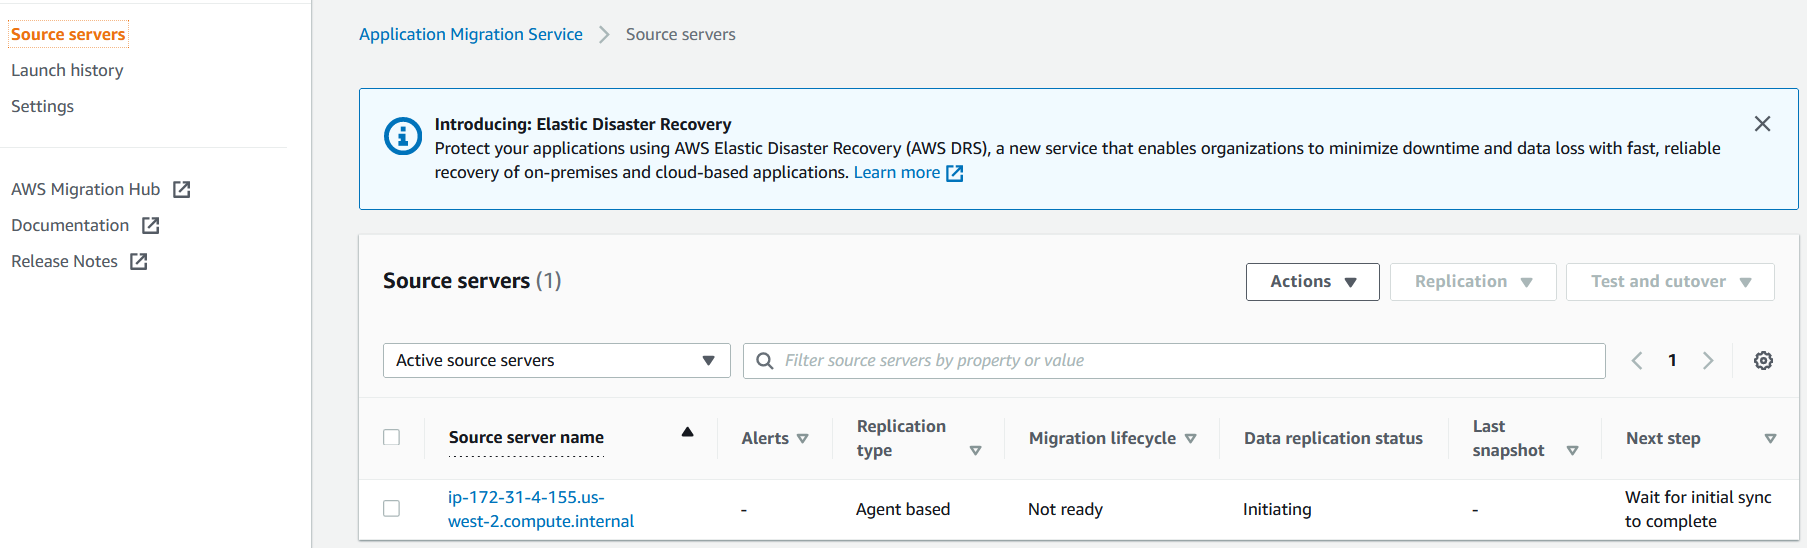
At this point, the source server should be synced with AWS MGN of the selected region and be visible.
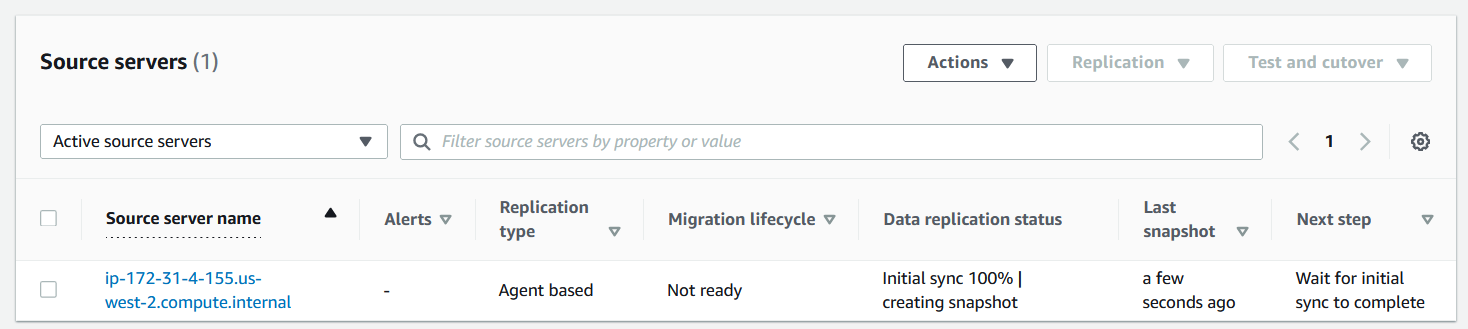
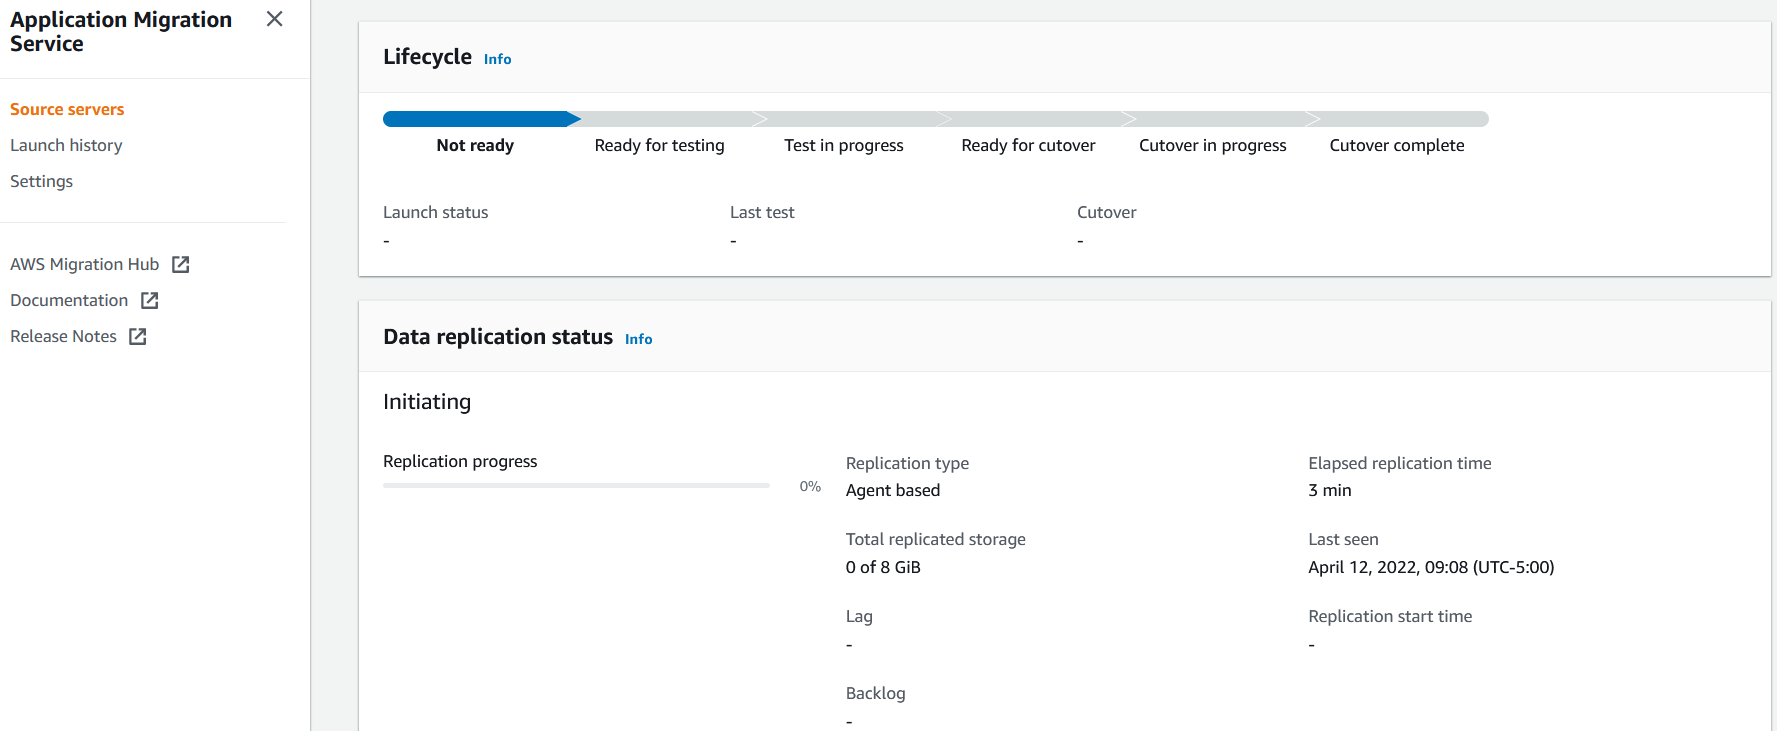
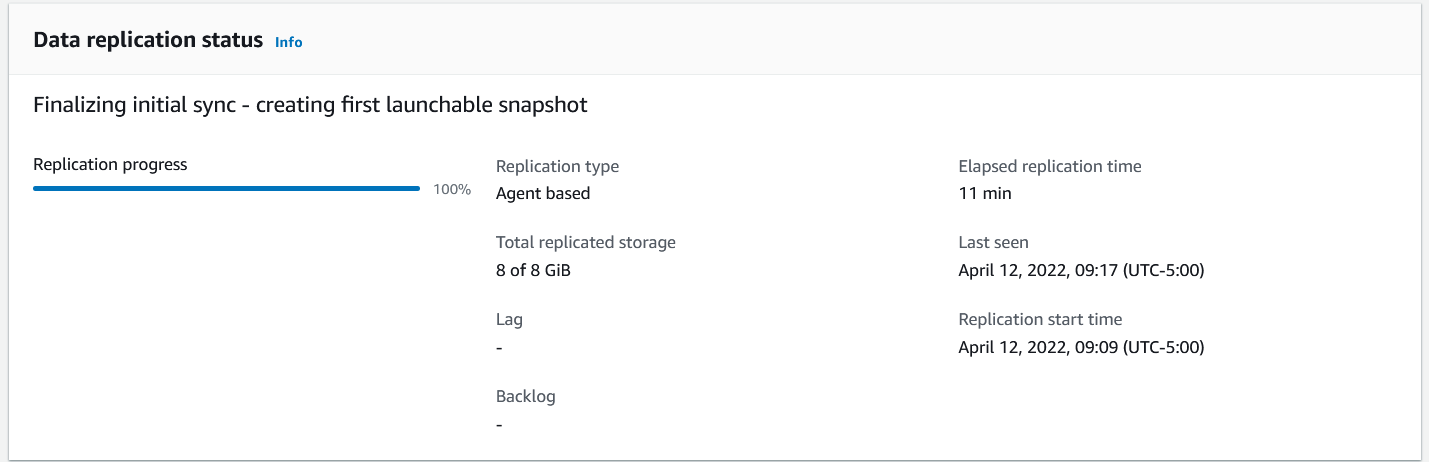
You can monitor the progress of replication.
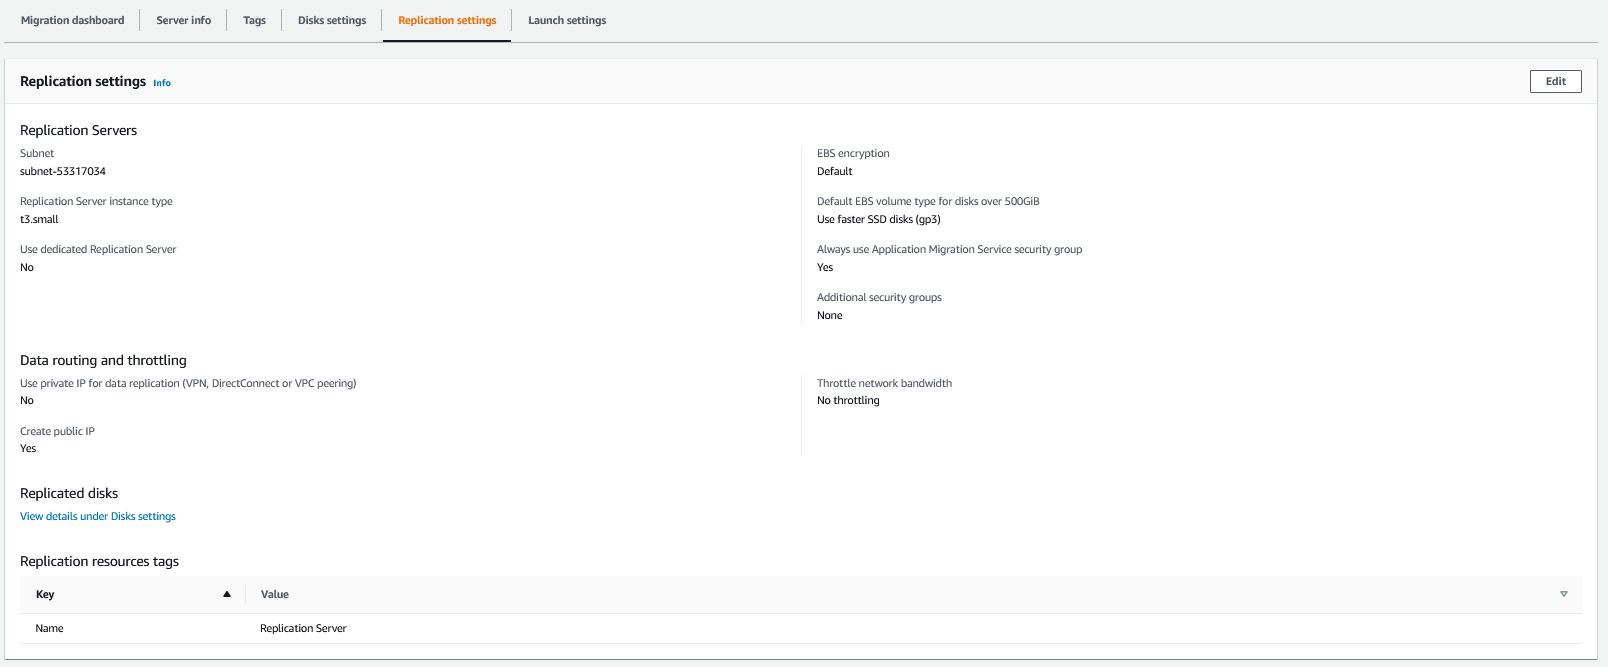
You can configure custom replication settings for a specific system on this tab. It may be helpful, especially for servers that experience many changes on their disks. You may want to change the Replication Server instance type to one with more bandwidth and assign a dedicated Replication Server.
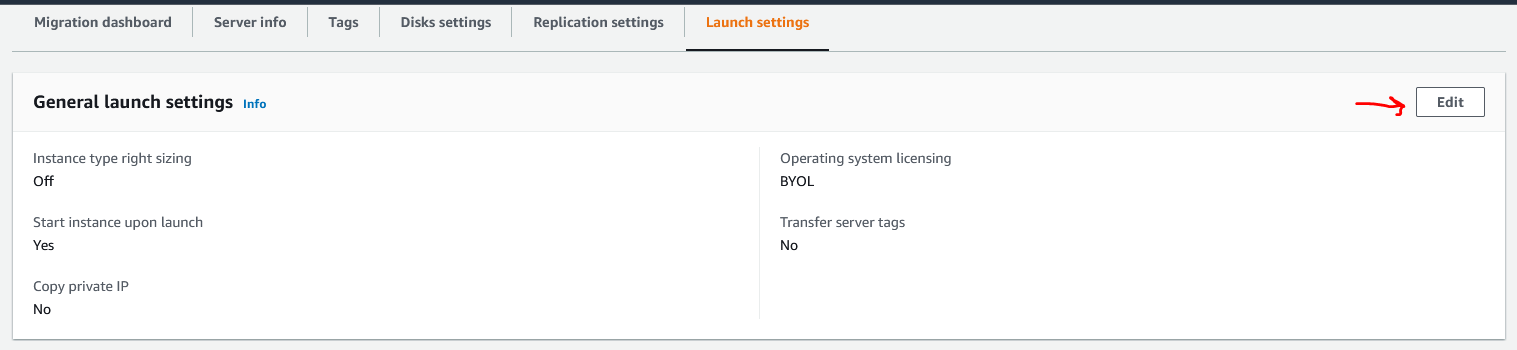
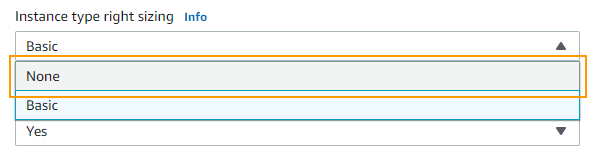
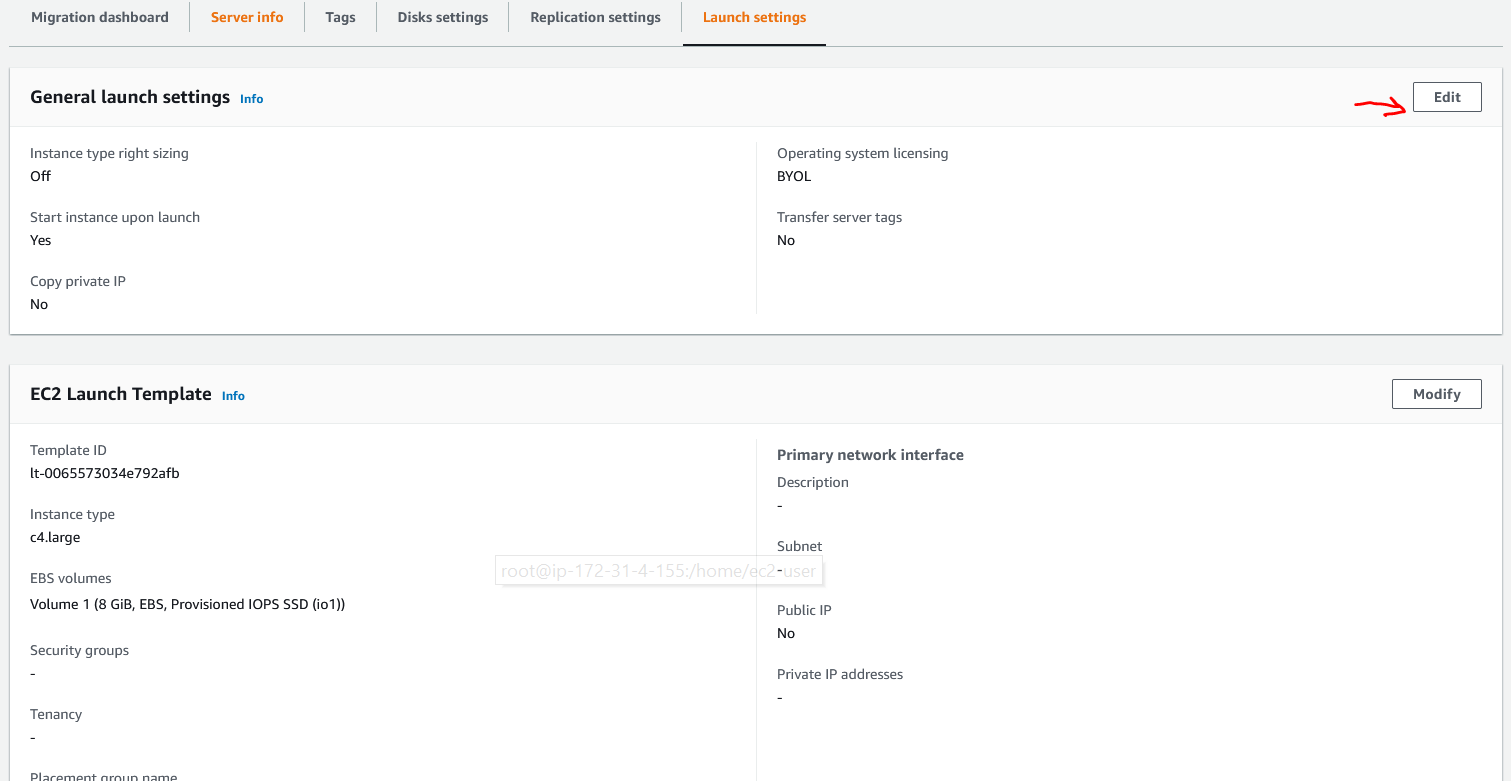
On this tab, you can configure details of how the EC2 instance of the replicated system should be configured in AWS. We will disable automated correct sizing and define the expected configuration of the target EC2 machine.
Click on the Modify button in the EC2 Launch Template section and confirm you want to Modify the launch template.
Review the various options available on the Modify template (Create new version) page by clicking on the Info link next to each section title.
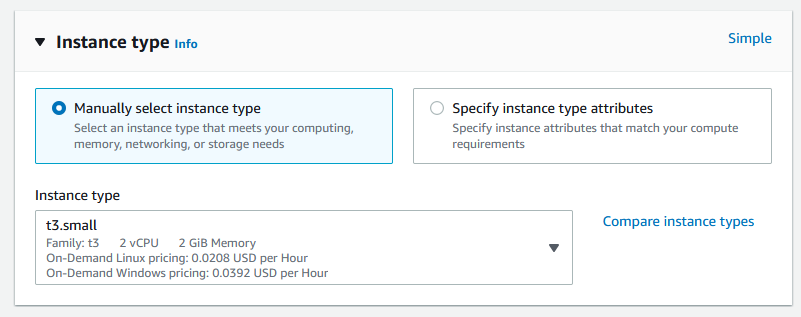
Scroll to the Instance type section and change the selection to t3.small machine instance type when you're done.
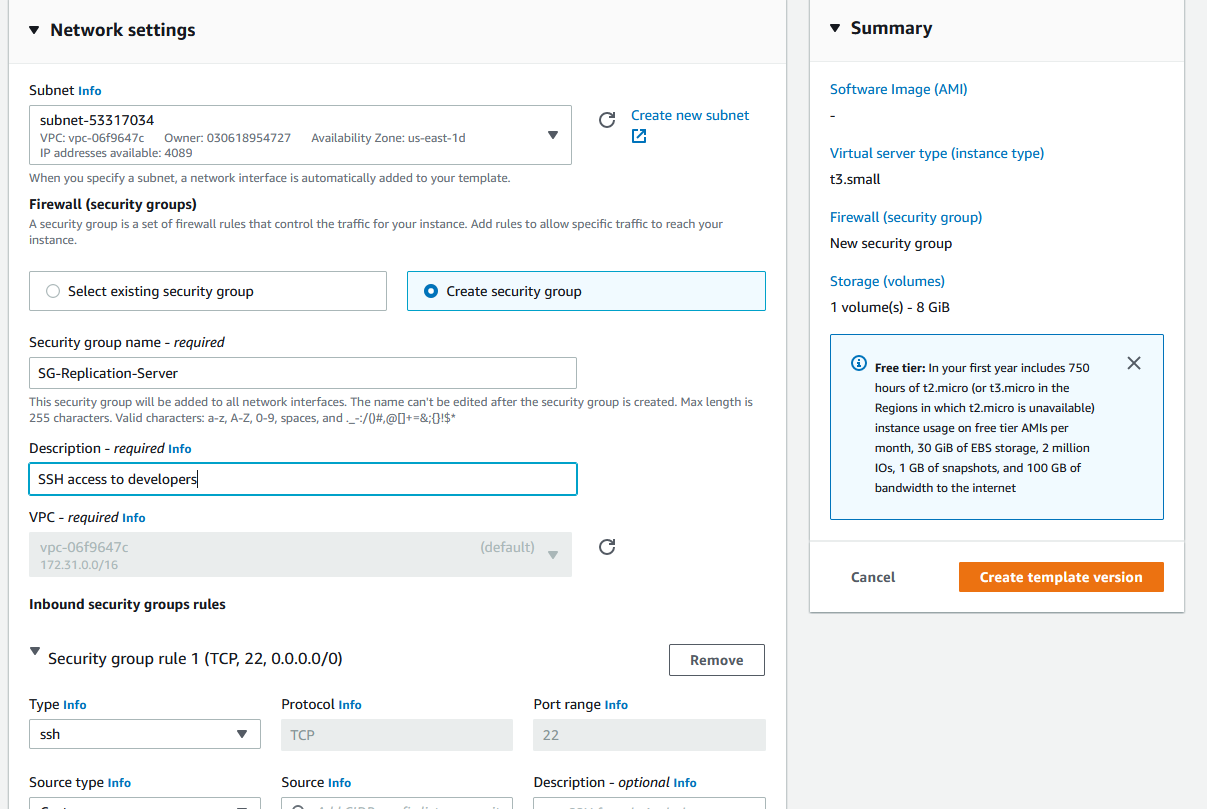
Finally, in the Network interfaces section, for the first Network interface, set Auto-assign public IP to Enable to make sure the webserver will be accessible over public IP and select TargetVPC-public-a as the subnet - this is where we want our webserver to run after the migration.
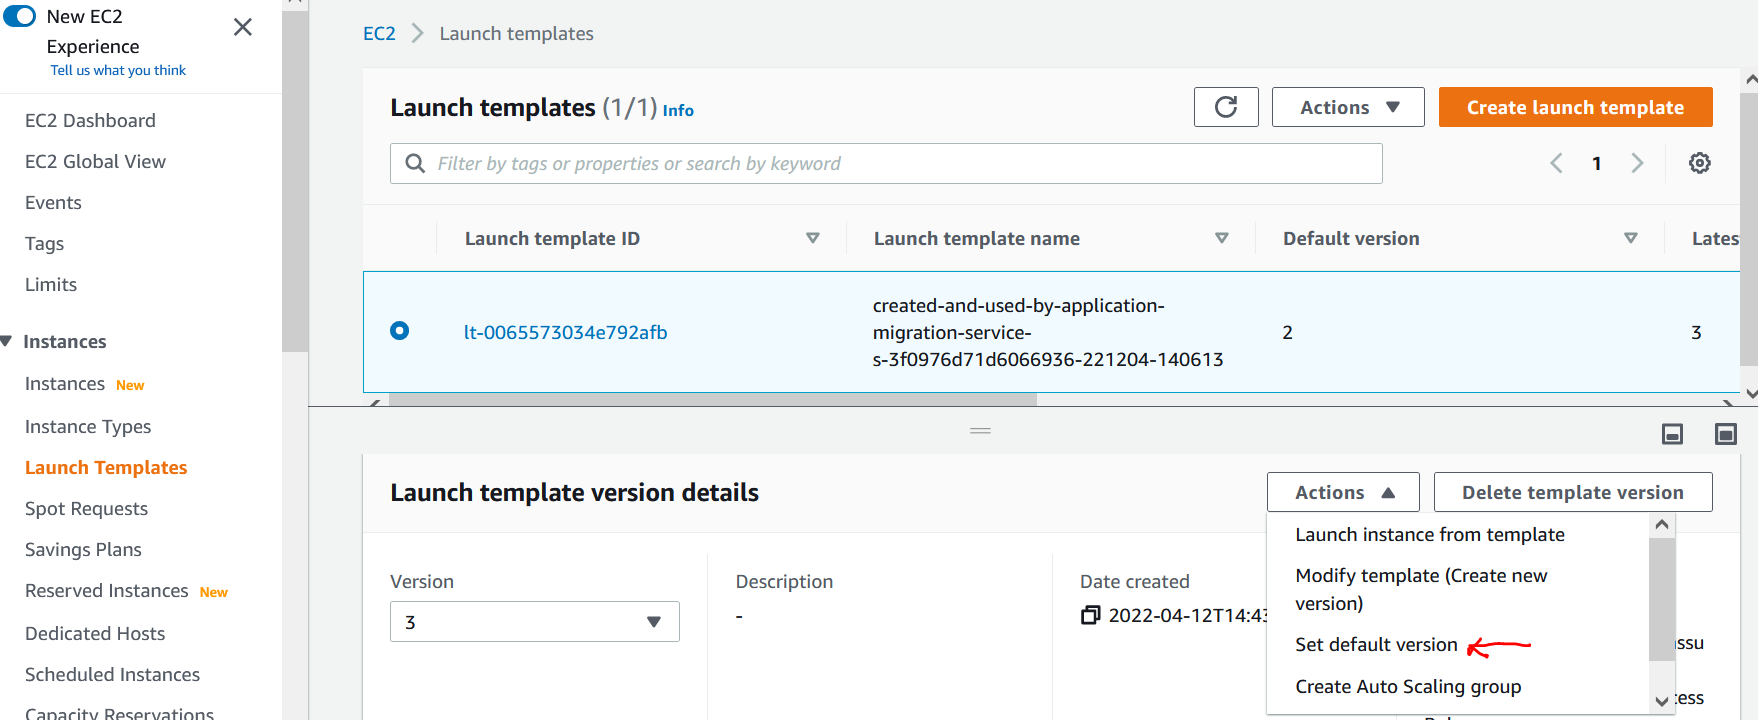
In the Launch Templates from the EC2 section, go to the Versions tab and select the latest version by clicking on the radio box on the left.
From the Actions menu, select Set default version.
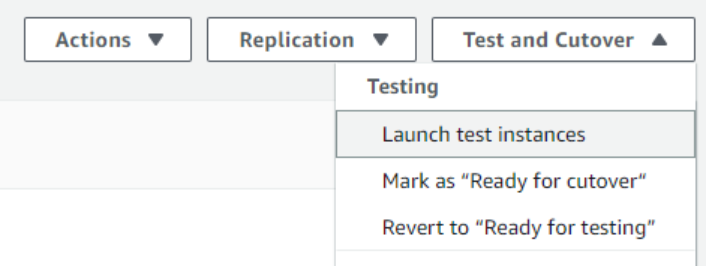
Go back to the Application Migration Service, go to server details, click on the Test and Cutover button, and select Launch test instance from the menu.
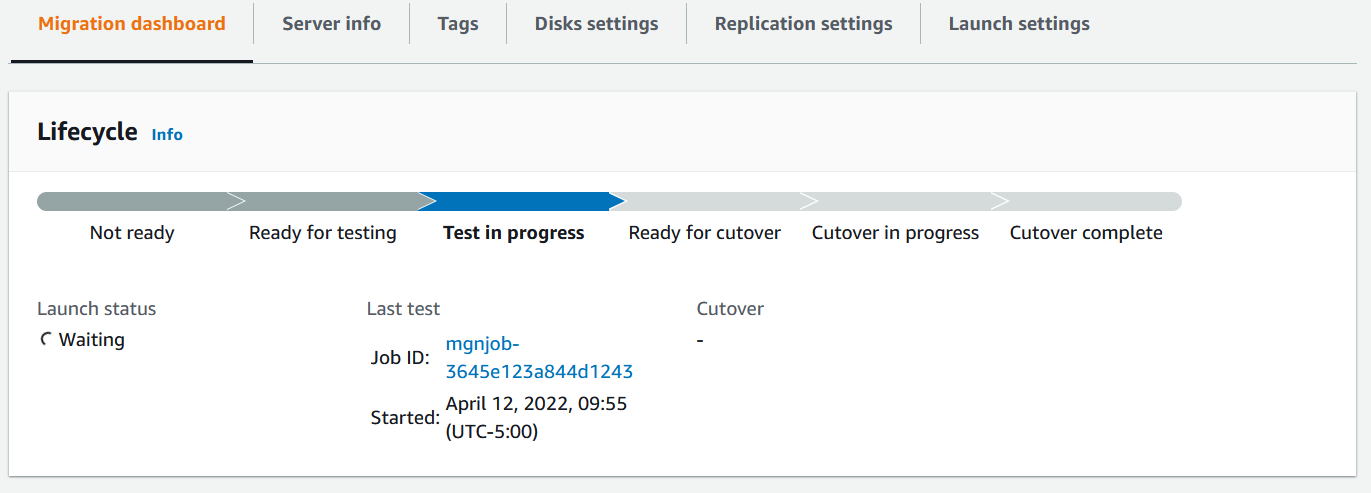
Click on the source server and observe the life cycle progress and the Replication initiation steps.
Go to EC2 and look for AWS Application Migration Service Replication Server.
As per your template, a server will be provisioned.
This is a time-consuming step; hence be patient. Once the server is provisioned, initial data synced, and a snapshot is created, it will be ready for testing.

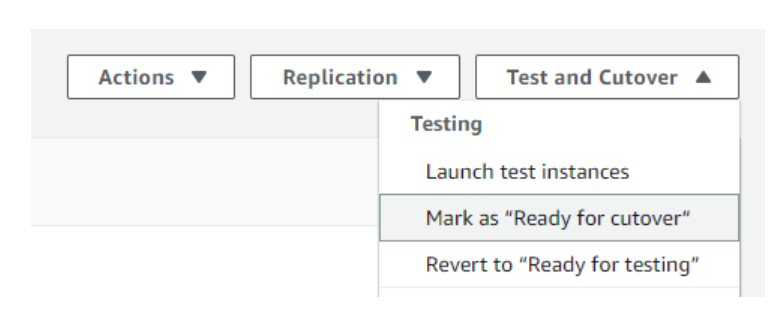
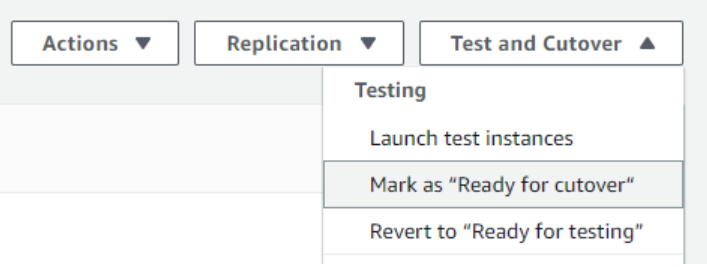
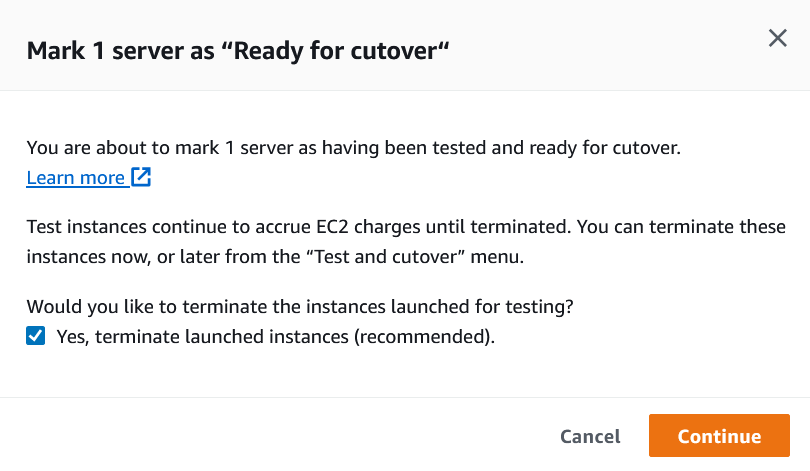
Go back to Source Servers, click on your server Hostname, then Test and Cutover -> Mark as "ready for cutover" and Continue on the popup to confirm that the testing went successful and testing instance can be terminated.

Go back to Source Servers, click on your server Hostname, then Test and Cutover -> Mark as "ready for cutover" and Continue on the popup to confirm that the testing went successful and testing instance can be terminated.

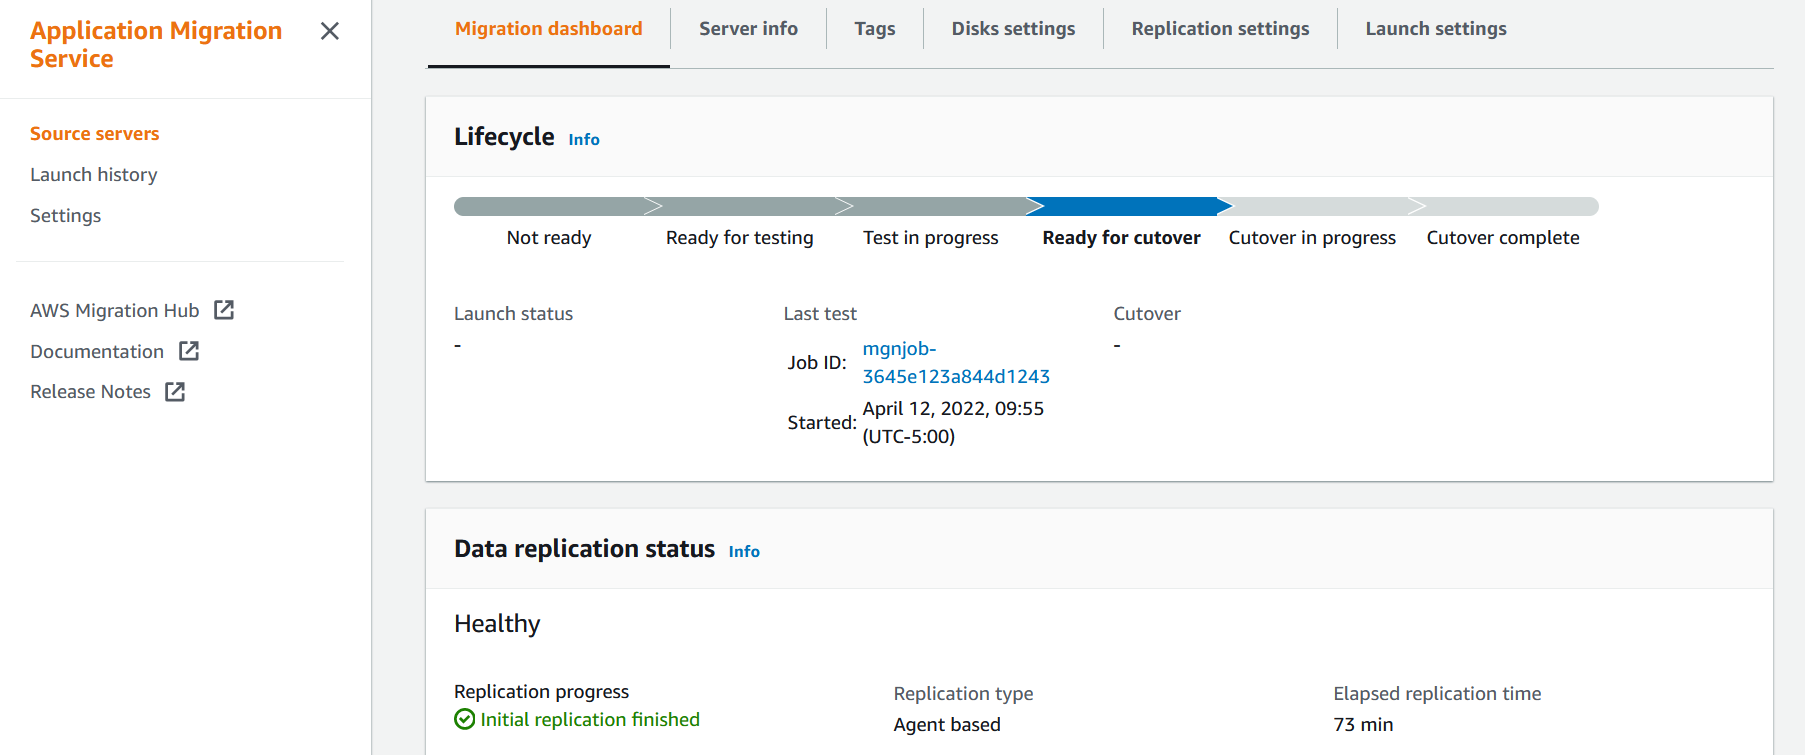
Now you are ready to launch the cutover instance.
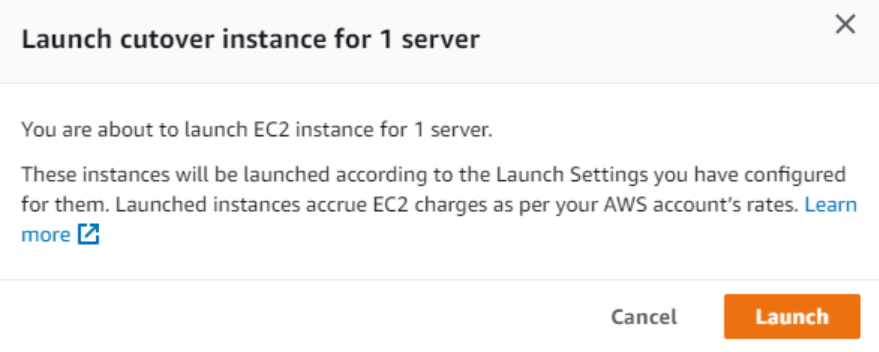
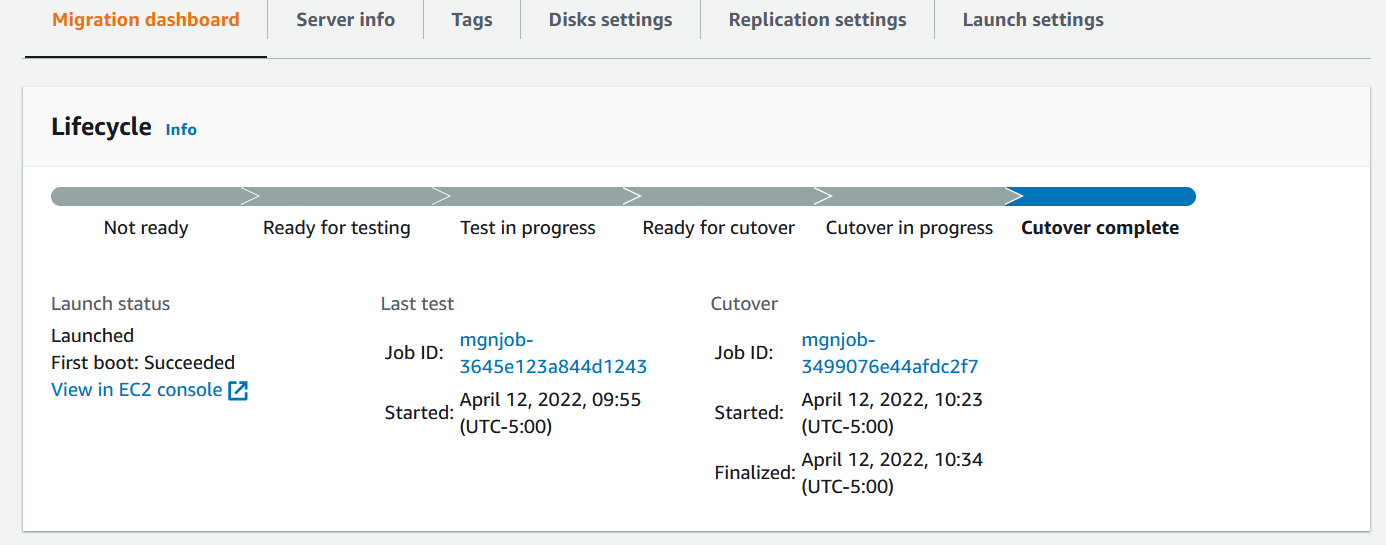
This will trigger the cutover job (it will take ~10-15 minutes). After clicking on Cutover Job ID in the Lifecycle section, you can find its details.
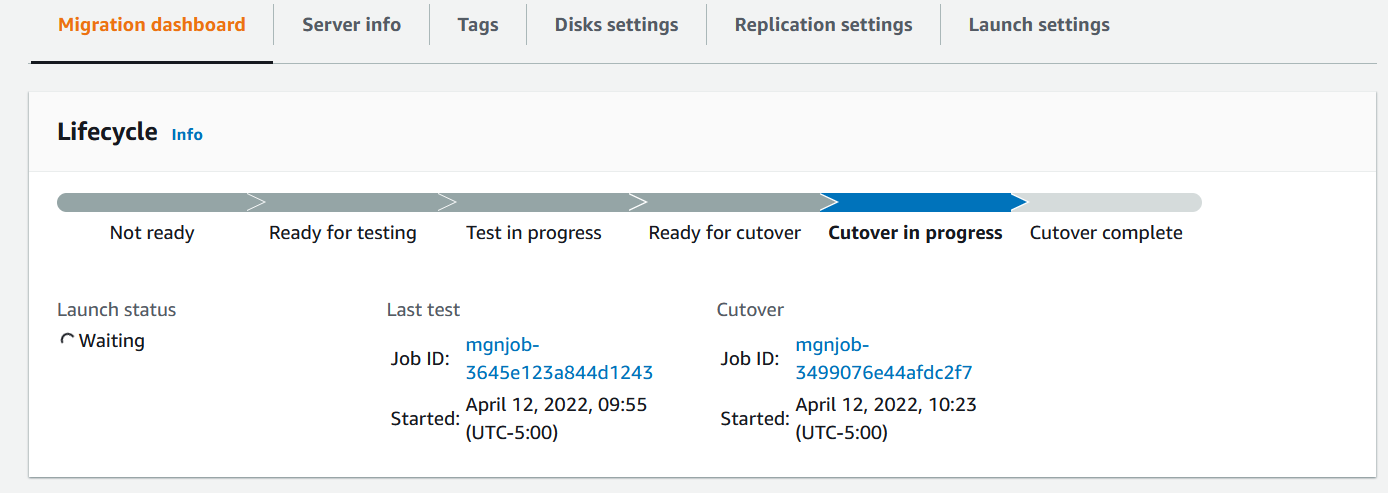
Cutover completed.
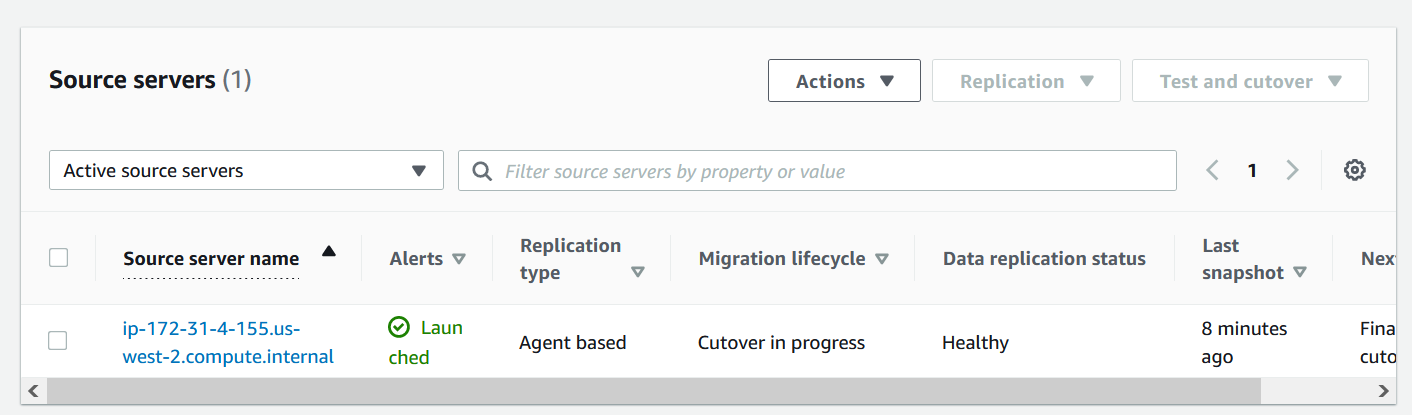
Wait for the Launch status to change from Waiting to Launched / First boot: Started. Your webserver will be visible and Running in the EC2 Console at this stage.
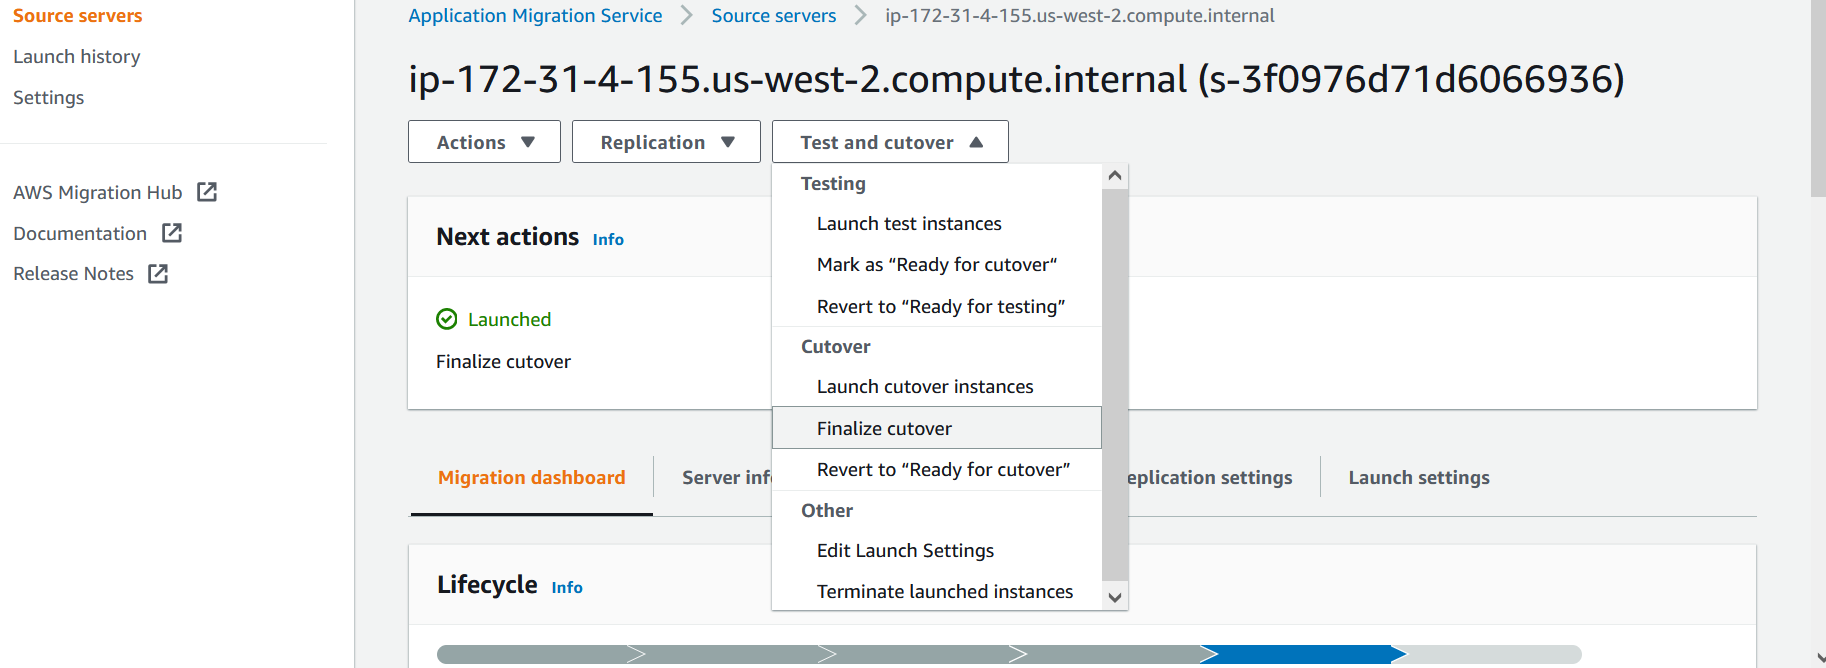
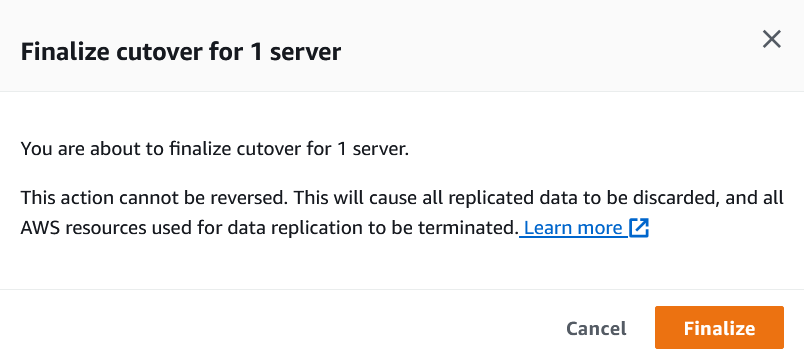
Finalize the cutover.
Click on Test and Cutover -> Finalize cutover, then confirm finalization of cutover to stop replication and cleanup resources used by Application Migration Service. Your migrated webserver, of course, will still be there in the EC2 Console!
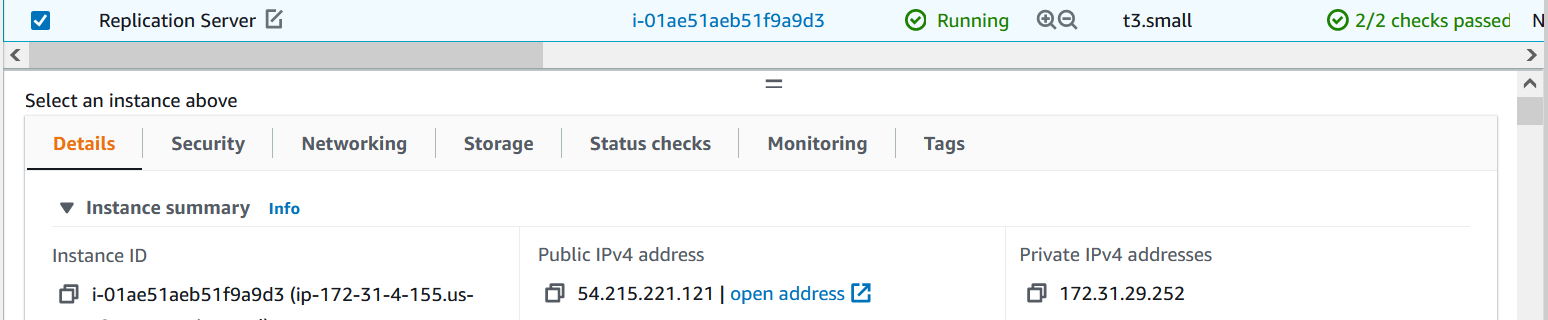
Go back to the EC2 section, select the Replication copy of the public IP, and verify the replication source server in the browser.
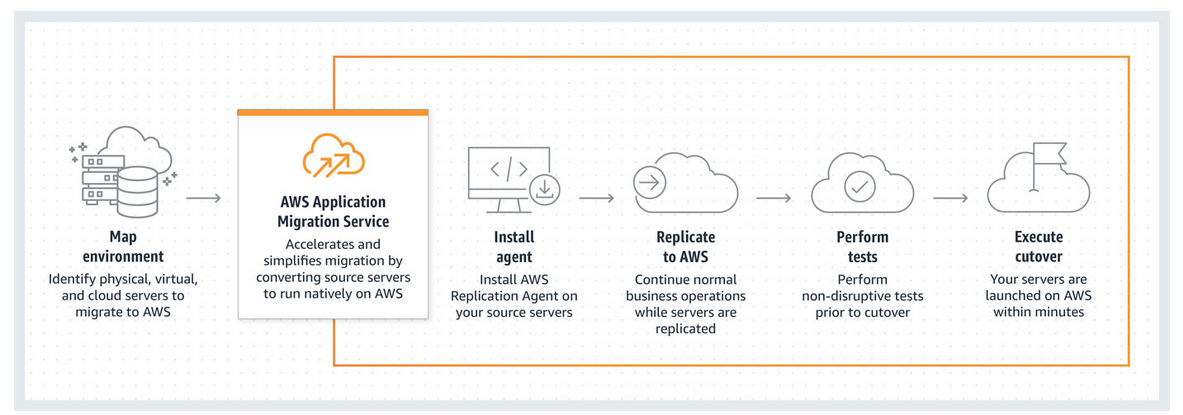
This article shows how to migrate applications to the cloud without changes and minimize time-intensive, error-prone manual processes by automatically converting your source servers from physical, virtual, or cloud infrastructure to run natively on AWS. It further simplifies your migration by enabling you to use the same automated process for various applications.
Some of the benefits of Application Migration Service are: